
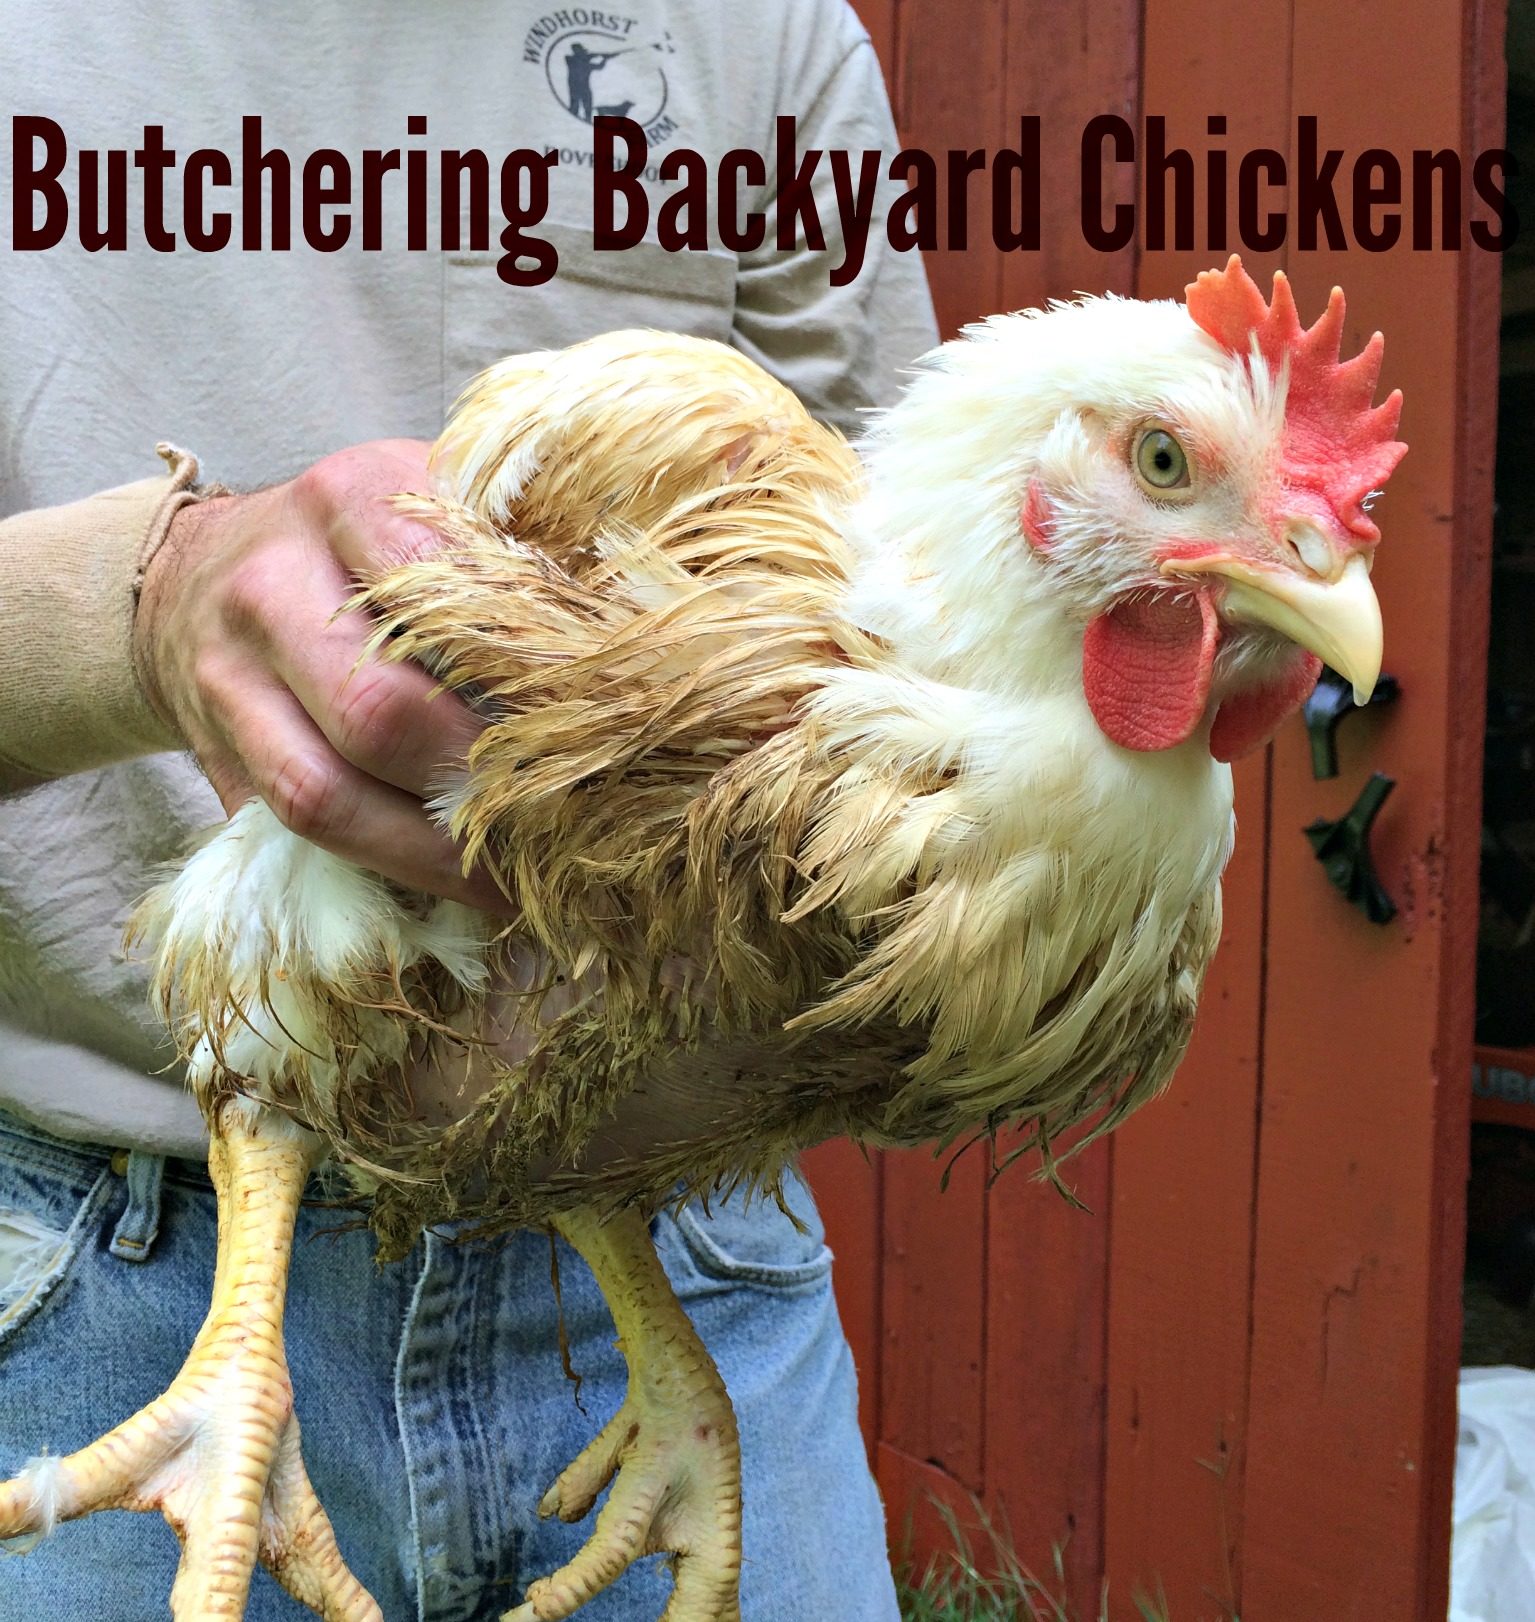
Butchering Backyard Chickens
Raising meat chickens is a remarkably simple, fast project. If you are raising Cornish Rock Cross, they go from the egg to the freezer in 6-8 weeks. I know there are other options in the meat chicken world. If you like your chickens to have lots of meat, be ready for slaughter in under 2 months and half bald (which really comes in handy at the plucking station) Cornish Rocks are great.
I have blogged briefly about processing your own chickens.
I haven’t ever done a true step-by-step guide. So, I figured it was time.
We’ve processed countless numbers of chickens here at our farm. We’re not experts, but we’re not newbies either. If you’re thinking about getting a few meat chicks to raise this spring, or you just have too many roosters crowing around your place – here’s our simple step-by-step process to getting those birds in the freezer.
It is always a little sad to say good bye to our meat chickens. We continue to raise and butcher our chickens because we want to eat food that is healthy and has been raised humanely.
In order for something to live (me), something must die (a chicken). This is true even if you are eating salads. That lettuce plant dies so you can live. We eat meat. We like chicken. So, we raise and butcher our chickens.
If you like to learn how to do new things. Like being self-sufficient. And don’t trust any “company” to raise your meat for you – you’re going to like this!
Processing your own chickens is fairly simple. Here’s a quick overview:
- Kill chicken
- Remove feathers
- Remove Feet & head
- Remove internal organs
- Wash & Bag
Doesn’t sound too bad, right? It’s not. Especially if you have a pot of simmering water and some large containers of ice sitting around.
Like everything in life, there is more than one way to process a chicken. We have 2 standard practices around here.
- With skin
- Without skin
Processing Chicken without Skin
DH hates dealing with skin. It can tear easily. Plucking is sometimes a pain. Pin feathers aren’t fun. If you want to process 20 chickens in no time flat, “skinless” is the way to go.
When you process your chicken sans skin you get to skip:
- The pot of simmering water
- Scalding the bird (Dipping the killed chicken in the water)
- Plucking
- Removing Pin Feathers
- Trying not to tear the skin
For these reasons, DH prefers to just remove the skin. It’s super easy. It’s like you are taking the chicken’s pajamas off.
Kill it. Pull the skin off. Take the innards out. Wash & bag. Now, that’s easy.
Unfortunately for DH, I like skin on my chicken.
Processing Chicken with Skin
This is the real deal folks. No short cuts. No easy road. The Real McCoy. The Full Monty.
In this scenario you may want to invite any non-squeamish friends over for a free meal and bribe them into plucking & gutting some dead chickens for you. The more hands the better.
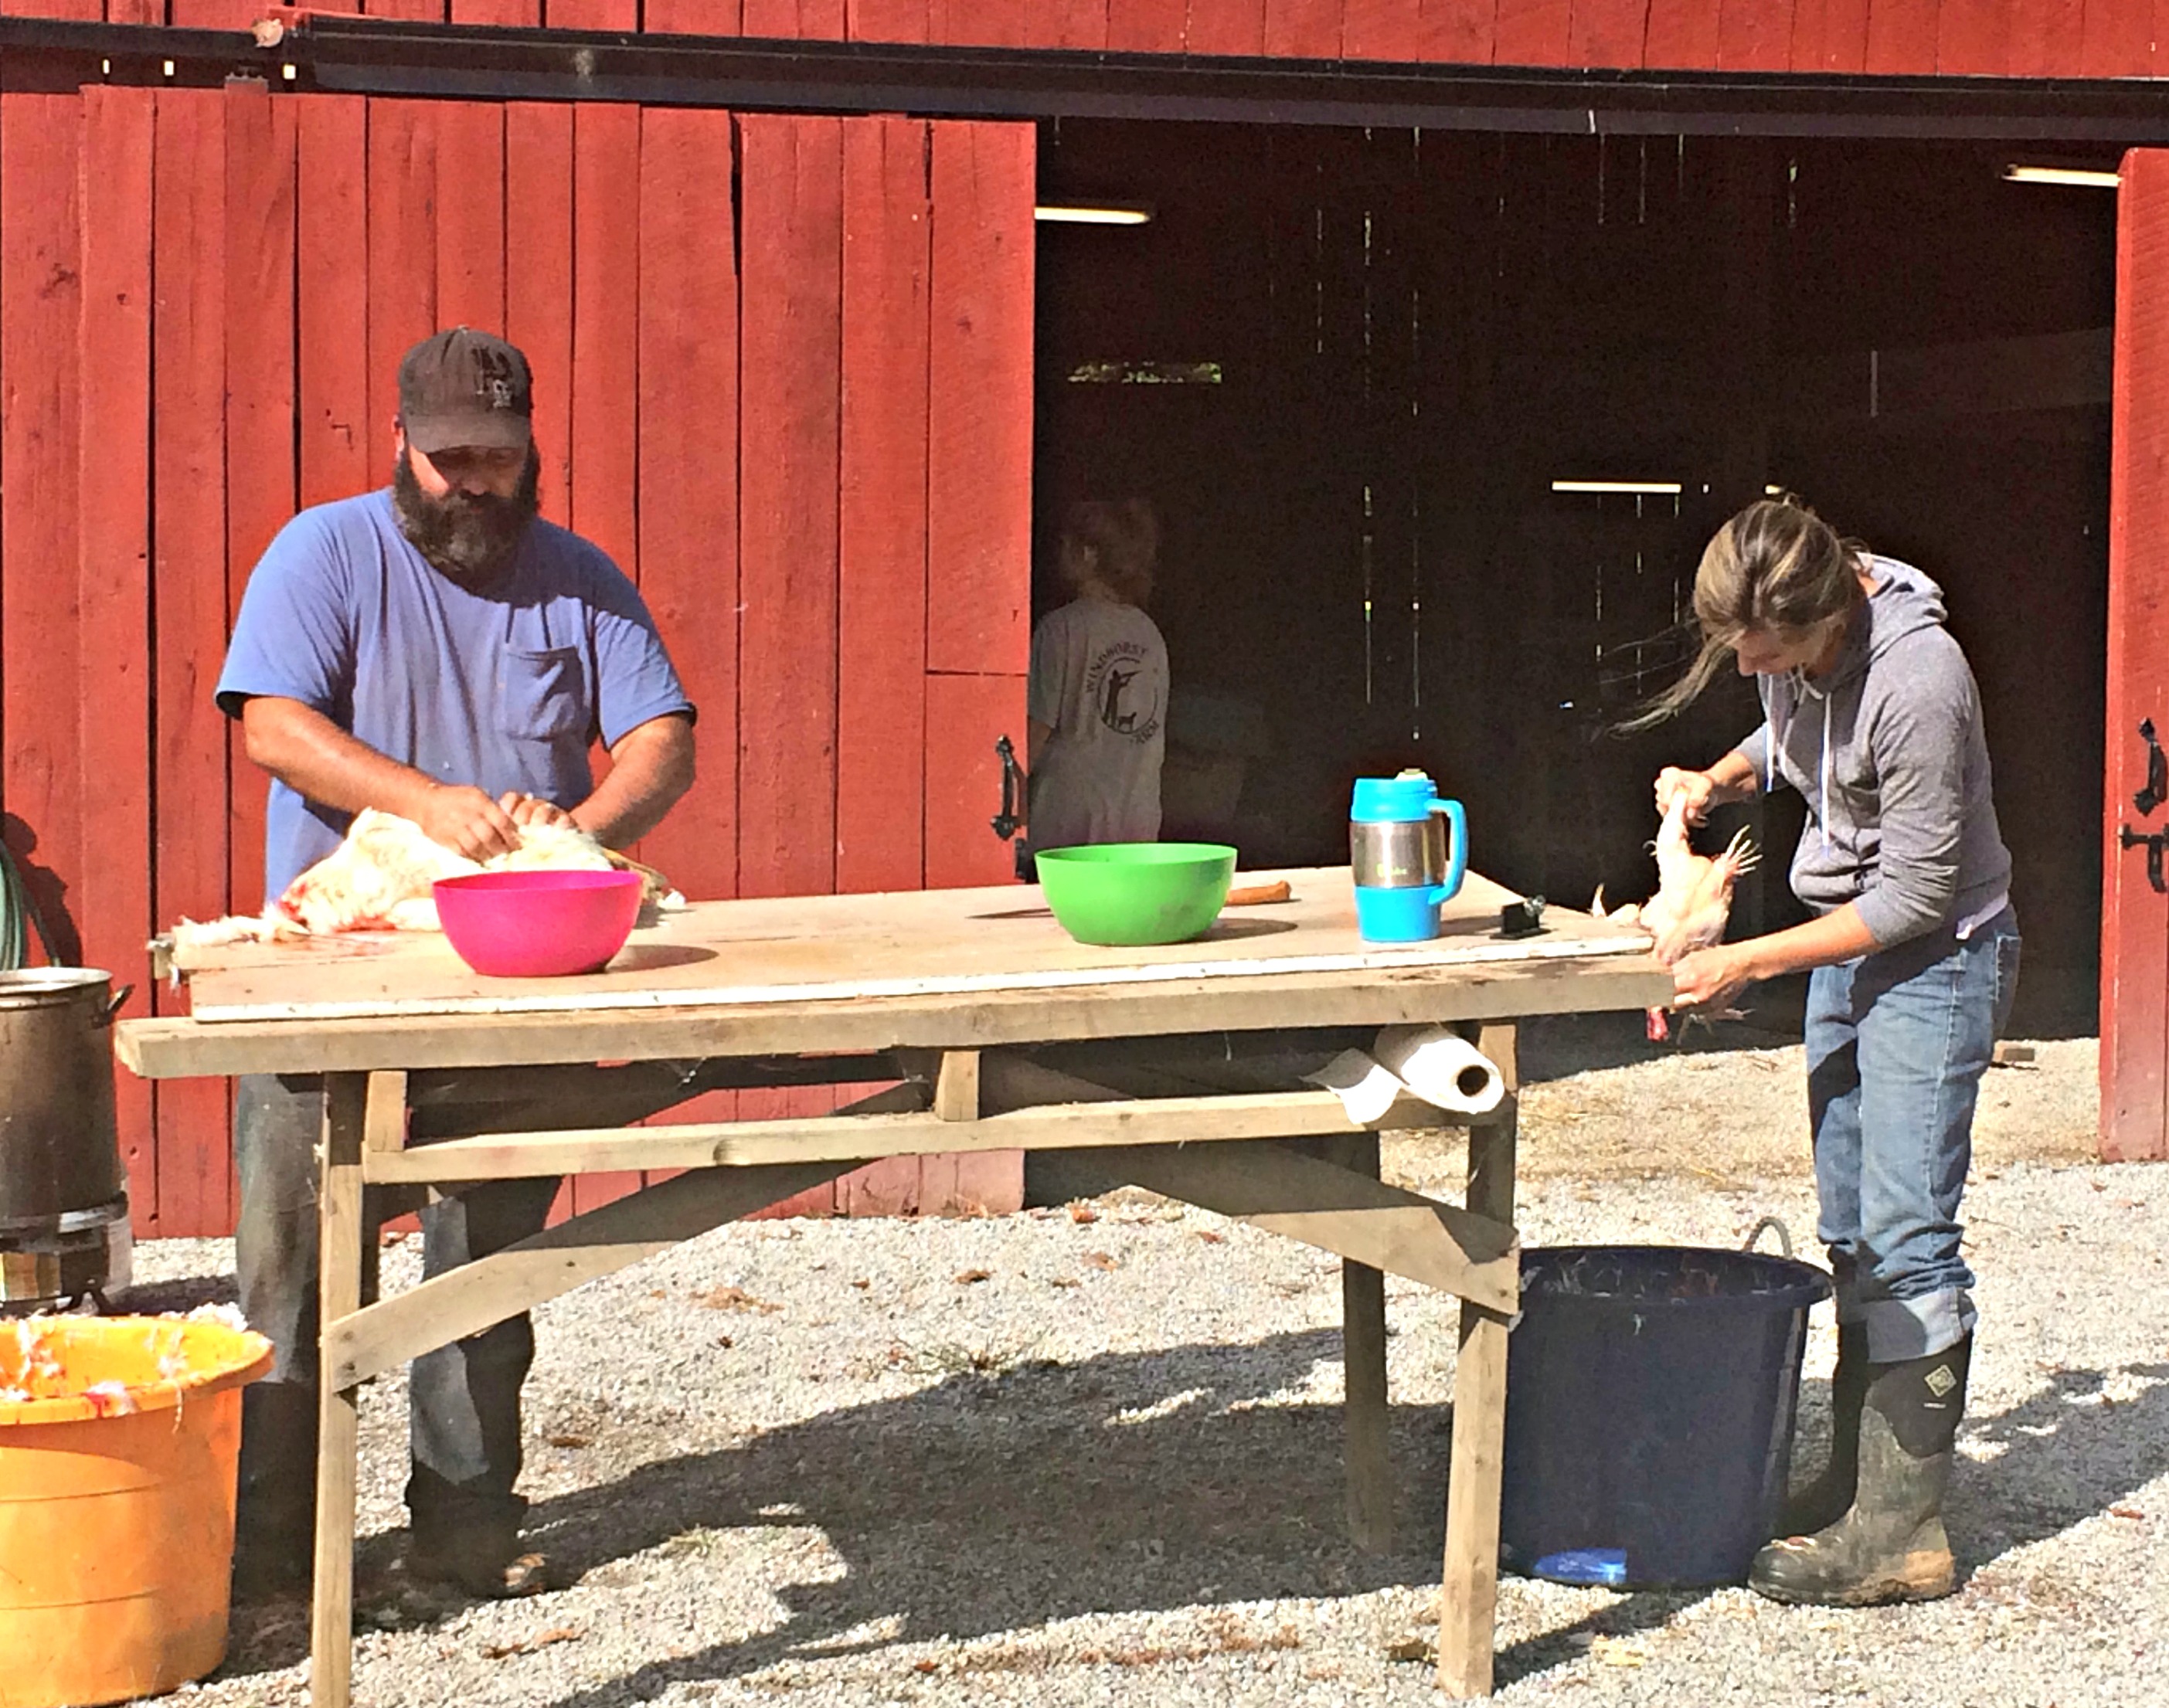
We set up stations and have designated people for each job.
- Runners: Bring the chickens from the pen to the chopping block (this is usually the kids around here)
- Station #1: Kill & Scald
- Station #2: Pluck & Remove feet
- Station #3: Remove guts
- Station #4: Wash & Bag
At our place, the people dipping and plucking (station #2) get handed the chicken after the entrails are out so they can wash & bag the birds (station #4). So, the folks at Station #2 & Station #4 are the same people.
Likewise, sometimes it’s just me and DH. In this scenario DH kills, scalds and guts. I pluck, chop, wash & bag. Big family fun.
What you’ll need:
- Sharp knives for killing, gutting & removing heads & feet
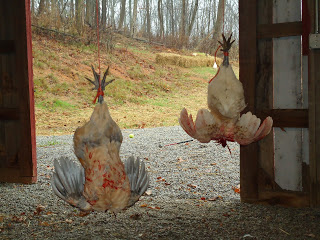
- Table to work on OR a string & place to hang your chickens.

Two chickens hanging by their feet… without heads
- Pot of simmering water
- Clean Work space (counter, board, table) for removing things (like feet and feathers)
- Sink for washing
- Containers (buckets or coolers) full of ice for holding chickens & assorted parts (gizzards, hearts, liver, necks)
- Bags for bagging
Now that we have all of our people and stations set – let’s process some chicken.
STEP ONE
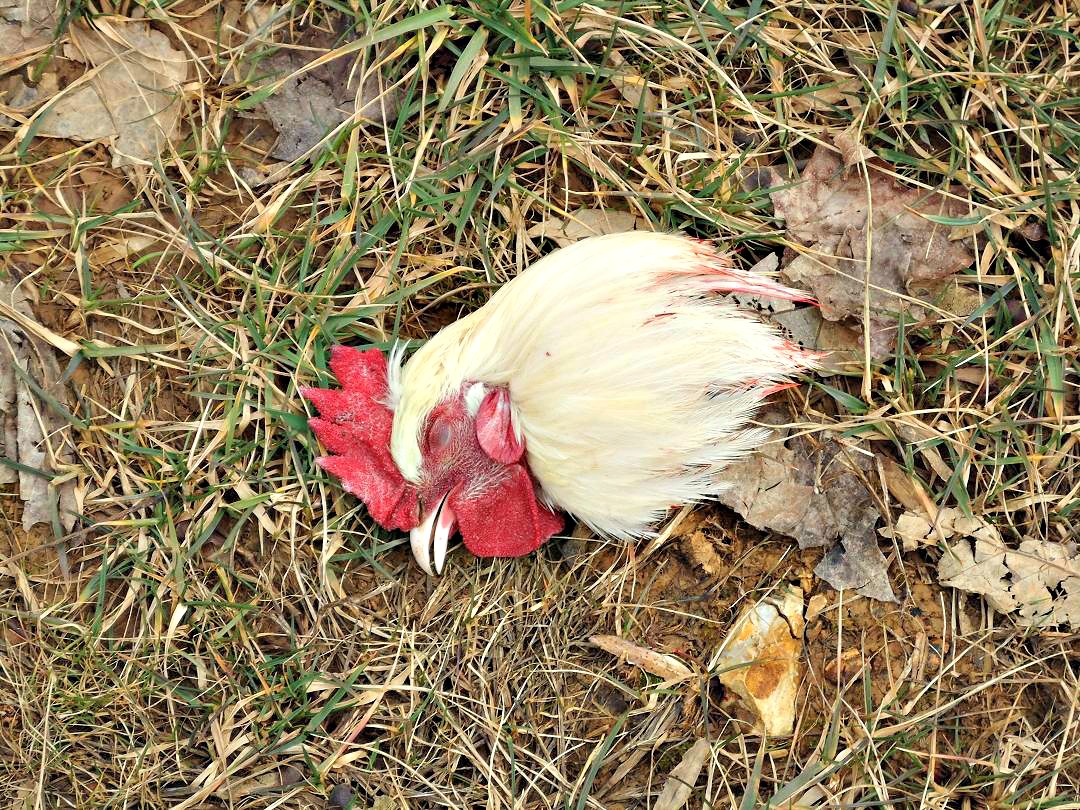
The kill.
This is pretty straight forward. You can chop off their heads. You can wring their necks. You can slit their throats. You can pull their heads off. You can shoot them with a .22.
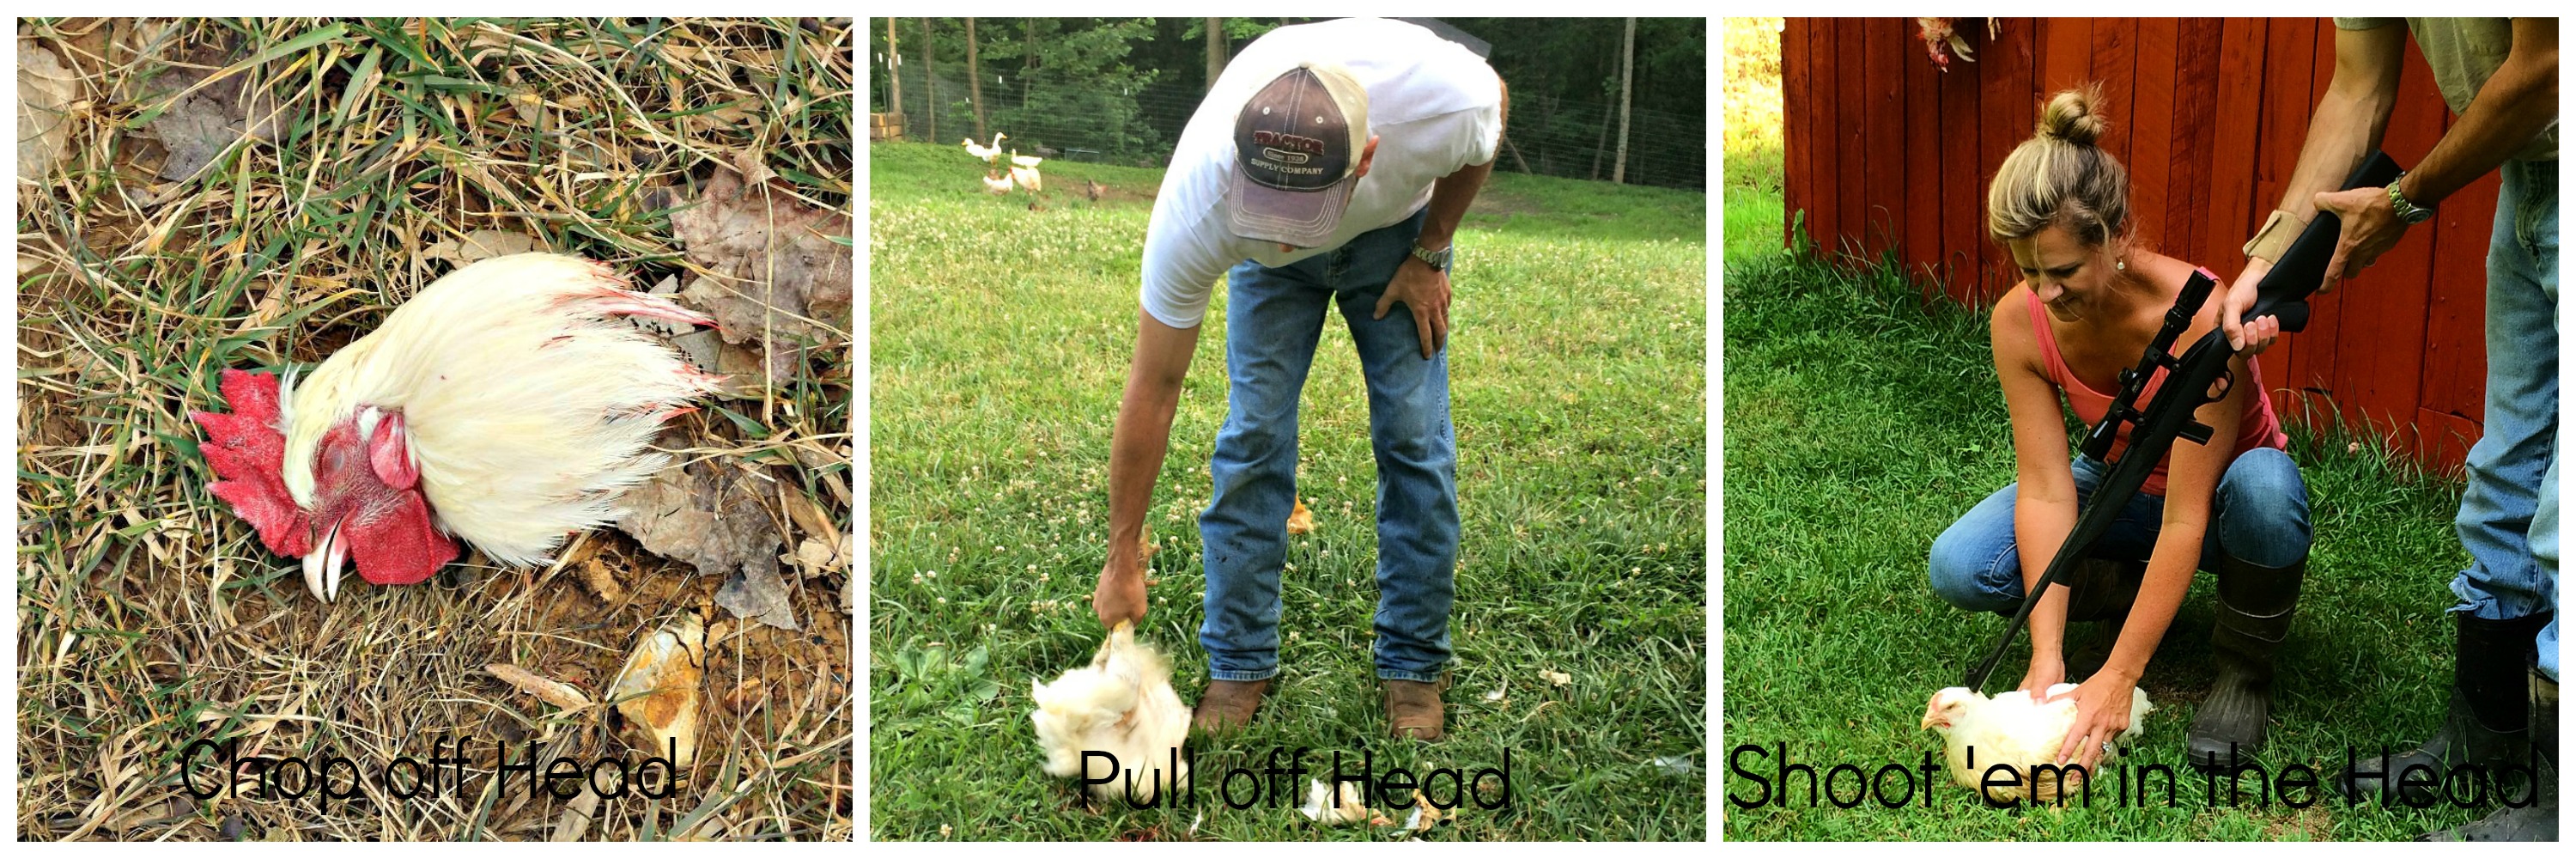
The goal is fast death with as little stress to the bird as possible. If the chicken is stressed when it is killed it can have an effect on the finished product.
The last 3 times we have butchered chickens (and ducks) we have used the “step on their heads and pull” system.
“When slaughtering chickens, especially a young fryer, you can simply step on the head and pull the hind legs. The head is very easily removed and killing chickens this way happens so fast the bird feels nothing. Just don’t mess around with it. Pull up fast.”
–countryfarm-lifestyles.com (source)
Although it sounds a bit barbaric and horrifying….. this stepping on the head and pulling the chicken is actually (we feel) the best way to kill a chicken. It is super easy. It is fast. It is not stressful. It is not messy. You don’t have to worry about “slitting” the throat in exactly the right spot. You don’t have to worry about suffering and pain on the chicken. You won’t have to purchase, mount or clean any kill cones. You won’t get covered in a shower of splattering blood. You just step on the head and pull. Done.
The killing station is the fastest and easiest. It takes 2 seconds. Kill it.
After it dies there will be “after effects” where the nervous system is freaking out and the bird flaps and goes a little crazy. We have killed chickens many different ways & they always wig out right after the deed is done.
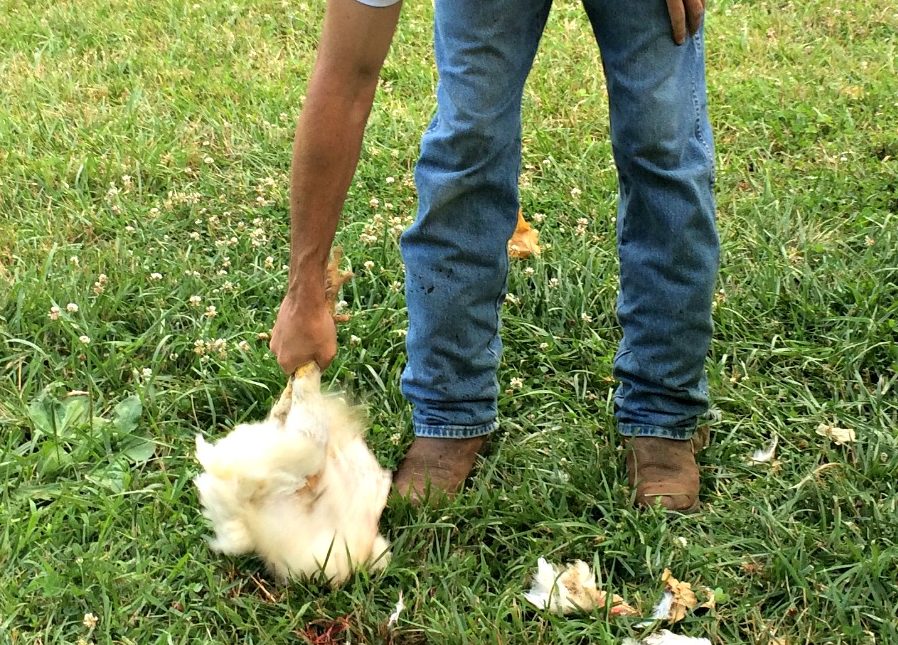 The best way to handle this (we think) is just to hold it by the feet near the ground until it quits moving. If you used the “step on the head and pull” technique you are basically in this position already, just hold the chicken there until it stops moving.
No backflips into the woods. No dead, headless chicken chasing small children around the farm. No blood splattering all over you and the barn and anything else within 15 feet (this was our experience with “kill cones”).
If you just hold it steady near the ground there’s no mess. It will be over in just a few seconds.
This also allows the bird to “bleed out.”
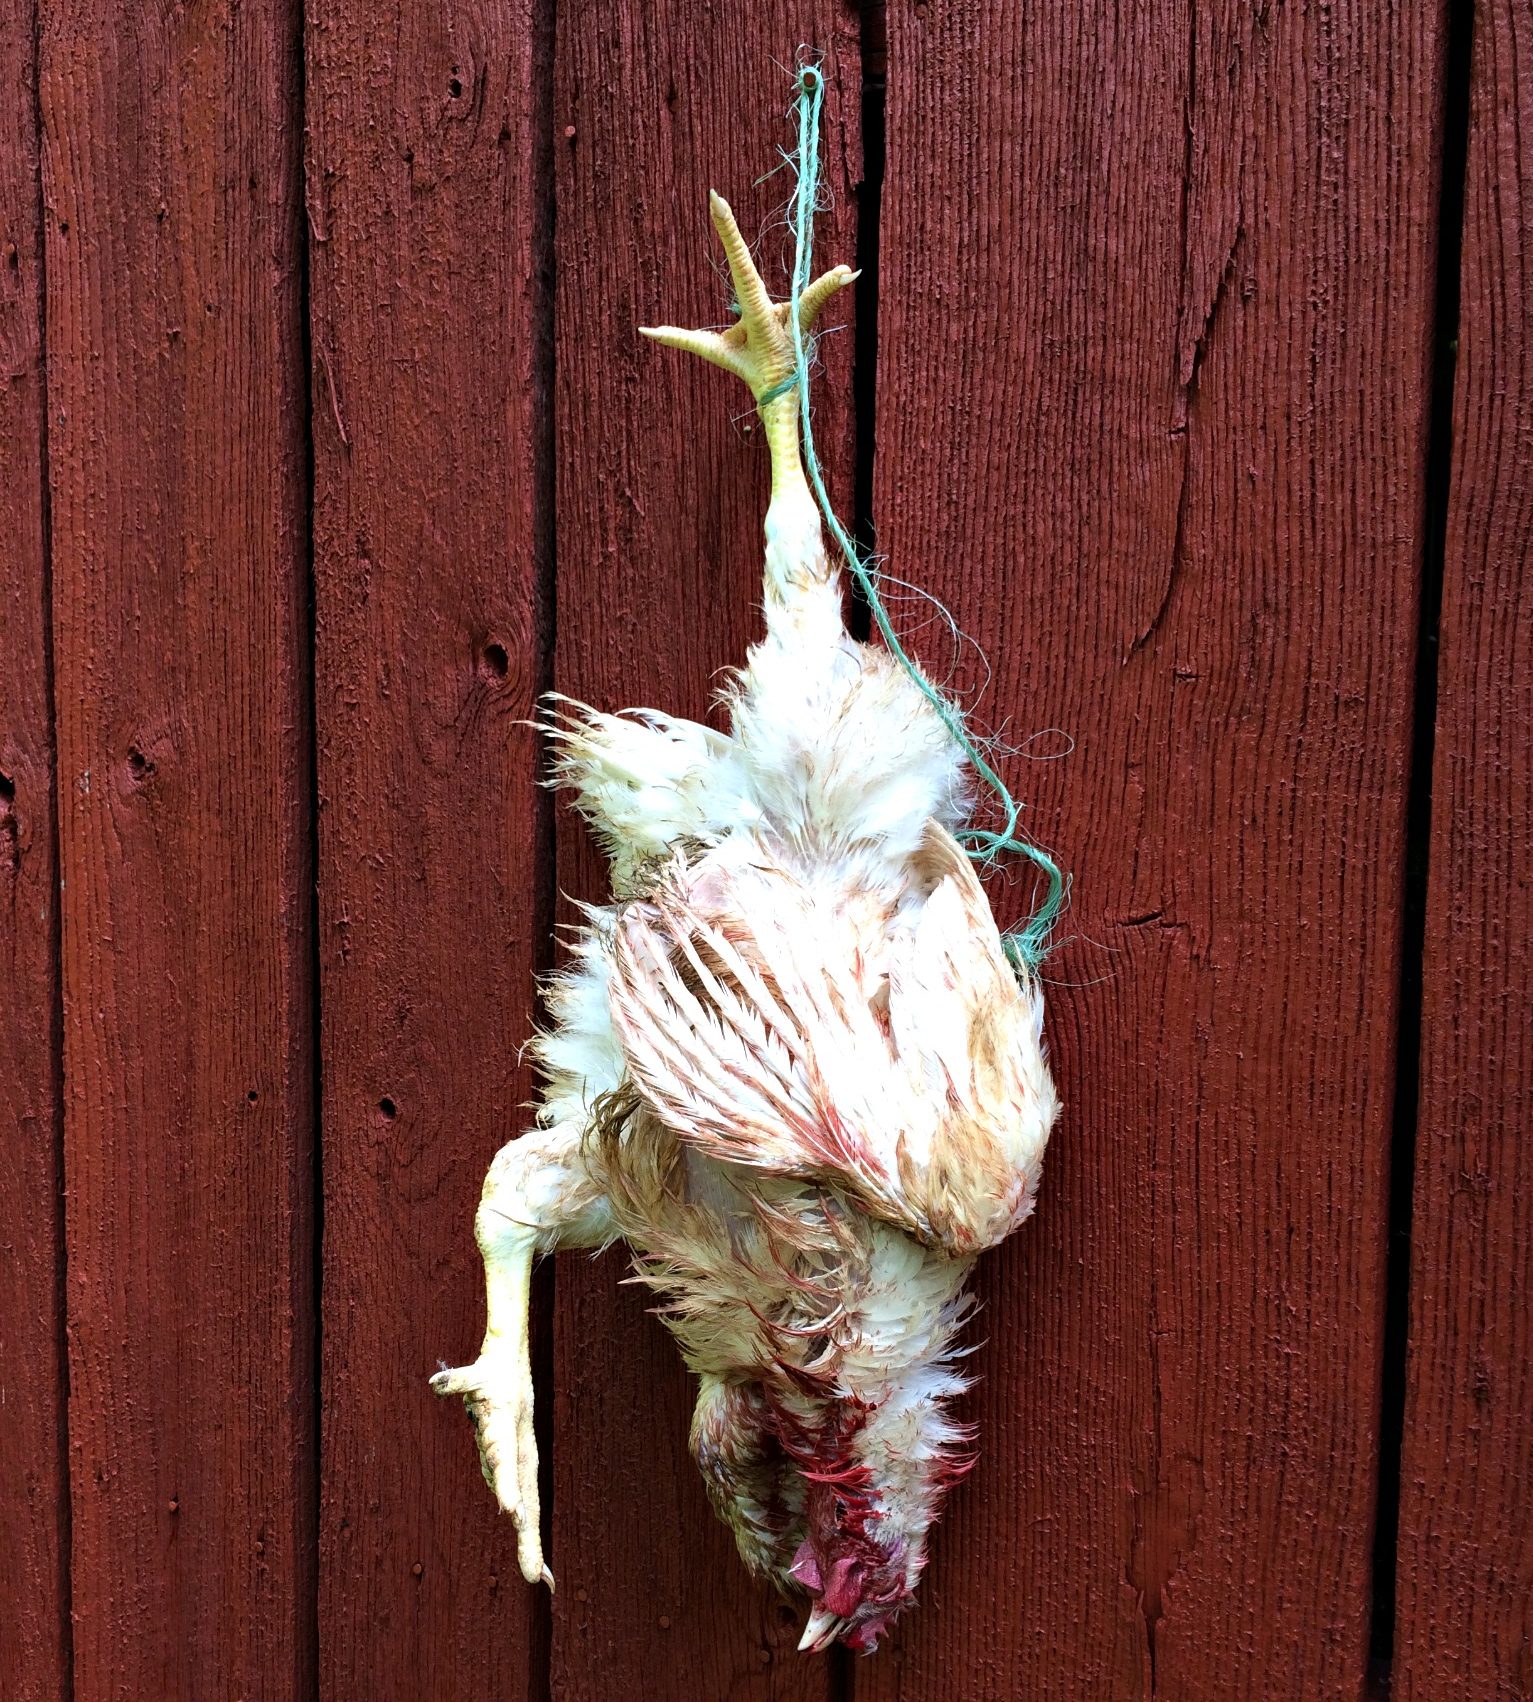
Optional: After it’s a goner you can hang it upside down so it can finish bleeding out. We have found that this isn’t always necessary. After we pull off their heads & hold them near the ground, most of the blood has already taken care of itself.
A time when it may come in handy to have a place to hang these guys would be if your “killing” person is faster than your “defeathering” person. If the chickens start to back up on you, it’s nice to have a clean place for them to “hang out” until you can get to them.
STEP TWO
It’s time to get the feathers off.
If your chicken died from a throat slitting or a gun shot and it’s head is still attached – you’re gonna want to remove it. It is going to get in the way.
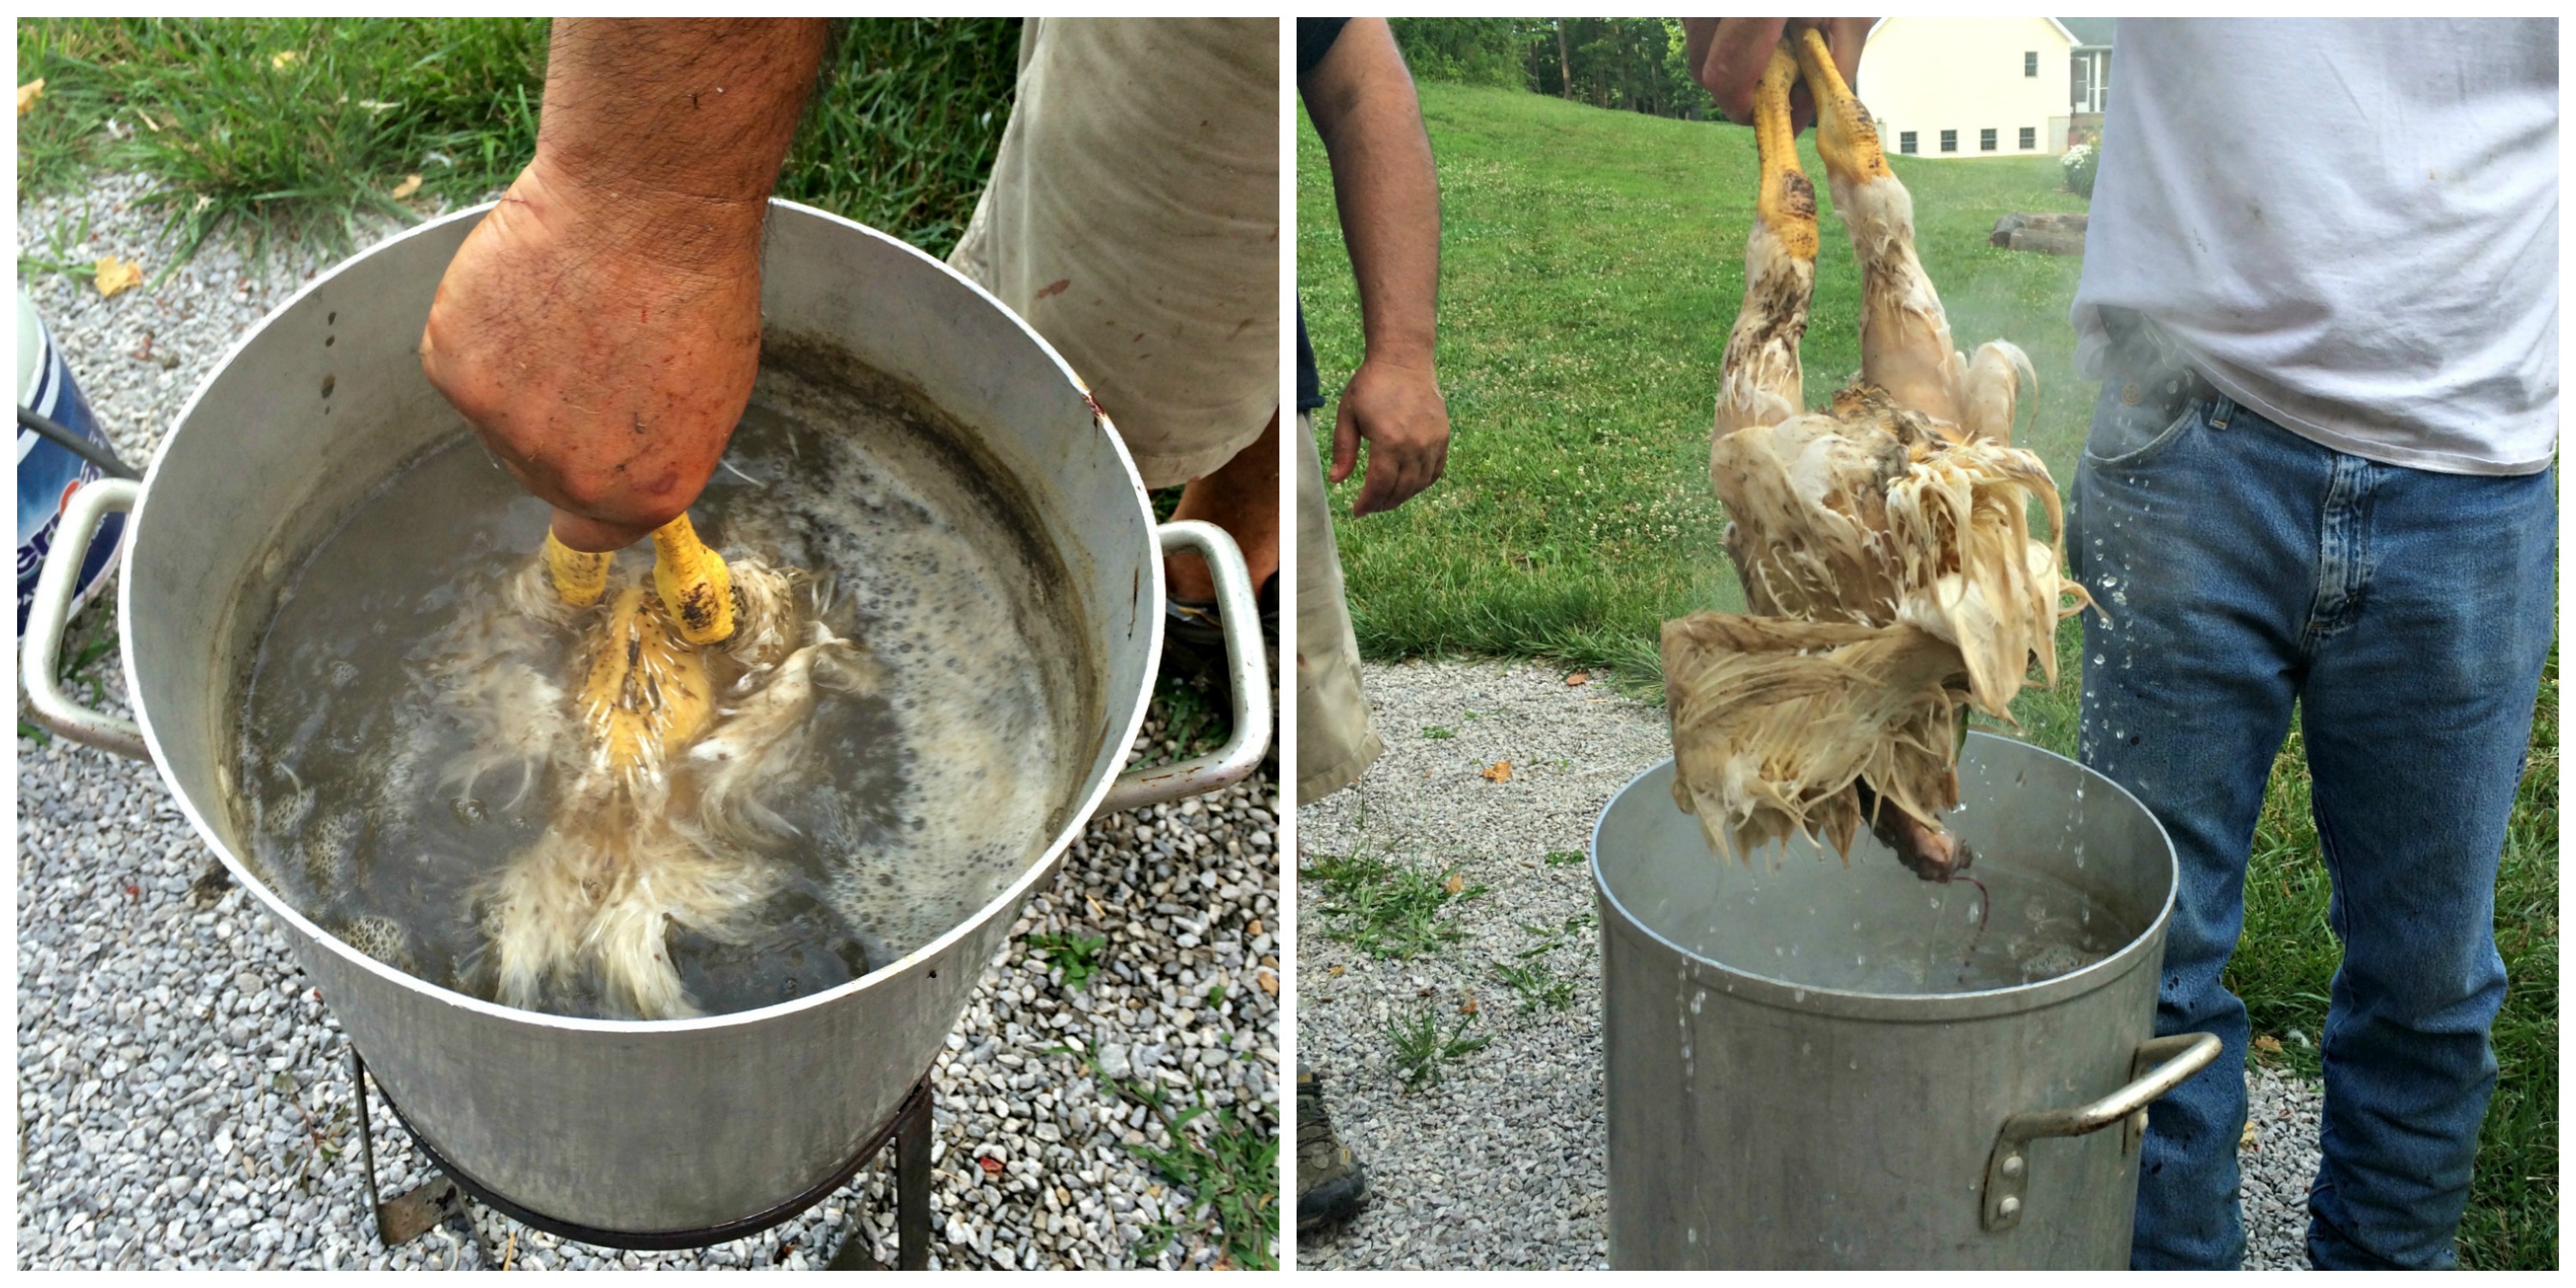
Once you have a decapitated bird, dip it in simmering water. This is going to make the plucking a super easy chore.
You don’t want to skip this step. The water should be about 145 degrees. This is hot enough to “scald” the skin without “cooking” the chicken.
We dunk our birds in the pot for a slow 10 -15 count. Moving the bird up and down in the water will ensure all the skin is saturated. When they come out of the water the feathers magically slide right off the bird. It’s quite amazing. You don’t need a de-feathering device. Hands work just fine.
Just work fast – once those wing feathers cool they are hard to get out. Pluck Pluck Pluck.
I can pluck a chicken in a couple of mintues if it’s been scalded. It’s really easy.
If you have the slowest plucker in the world, and he doesn’t get the feathers out fast, they will solidify back into place as the chicken cools. When this happens you can re-dunk the chicken in the simmering water to loosen things up again. This is not ideal, but I thought I’d mention that we sometimes do this when our children are helping.

A friend of ours brought this thing over the day we butchered our last batch of meat chickens. It was an attachment that went on a drill. Rubber fingers that spun really fast when you hit the trigger on the drill. It was fun to use – but totally not necessary. We have processed chickens without this doomahicky for years.
I really don’t think it saved us any time. I would rather slide the feathers off with my hands.
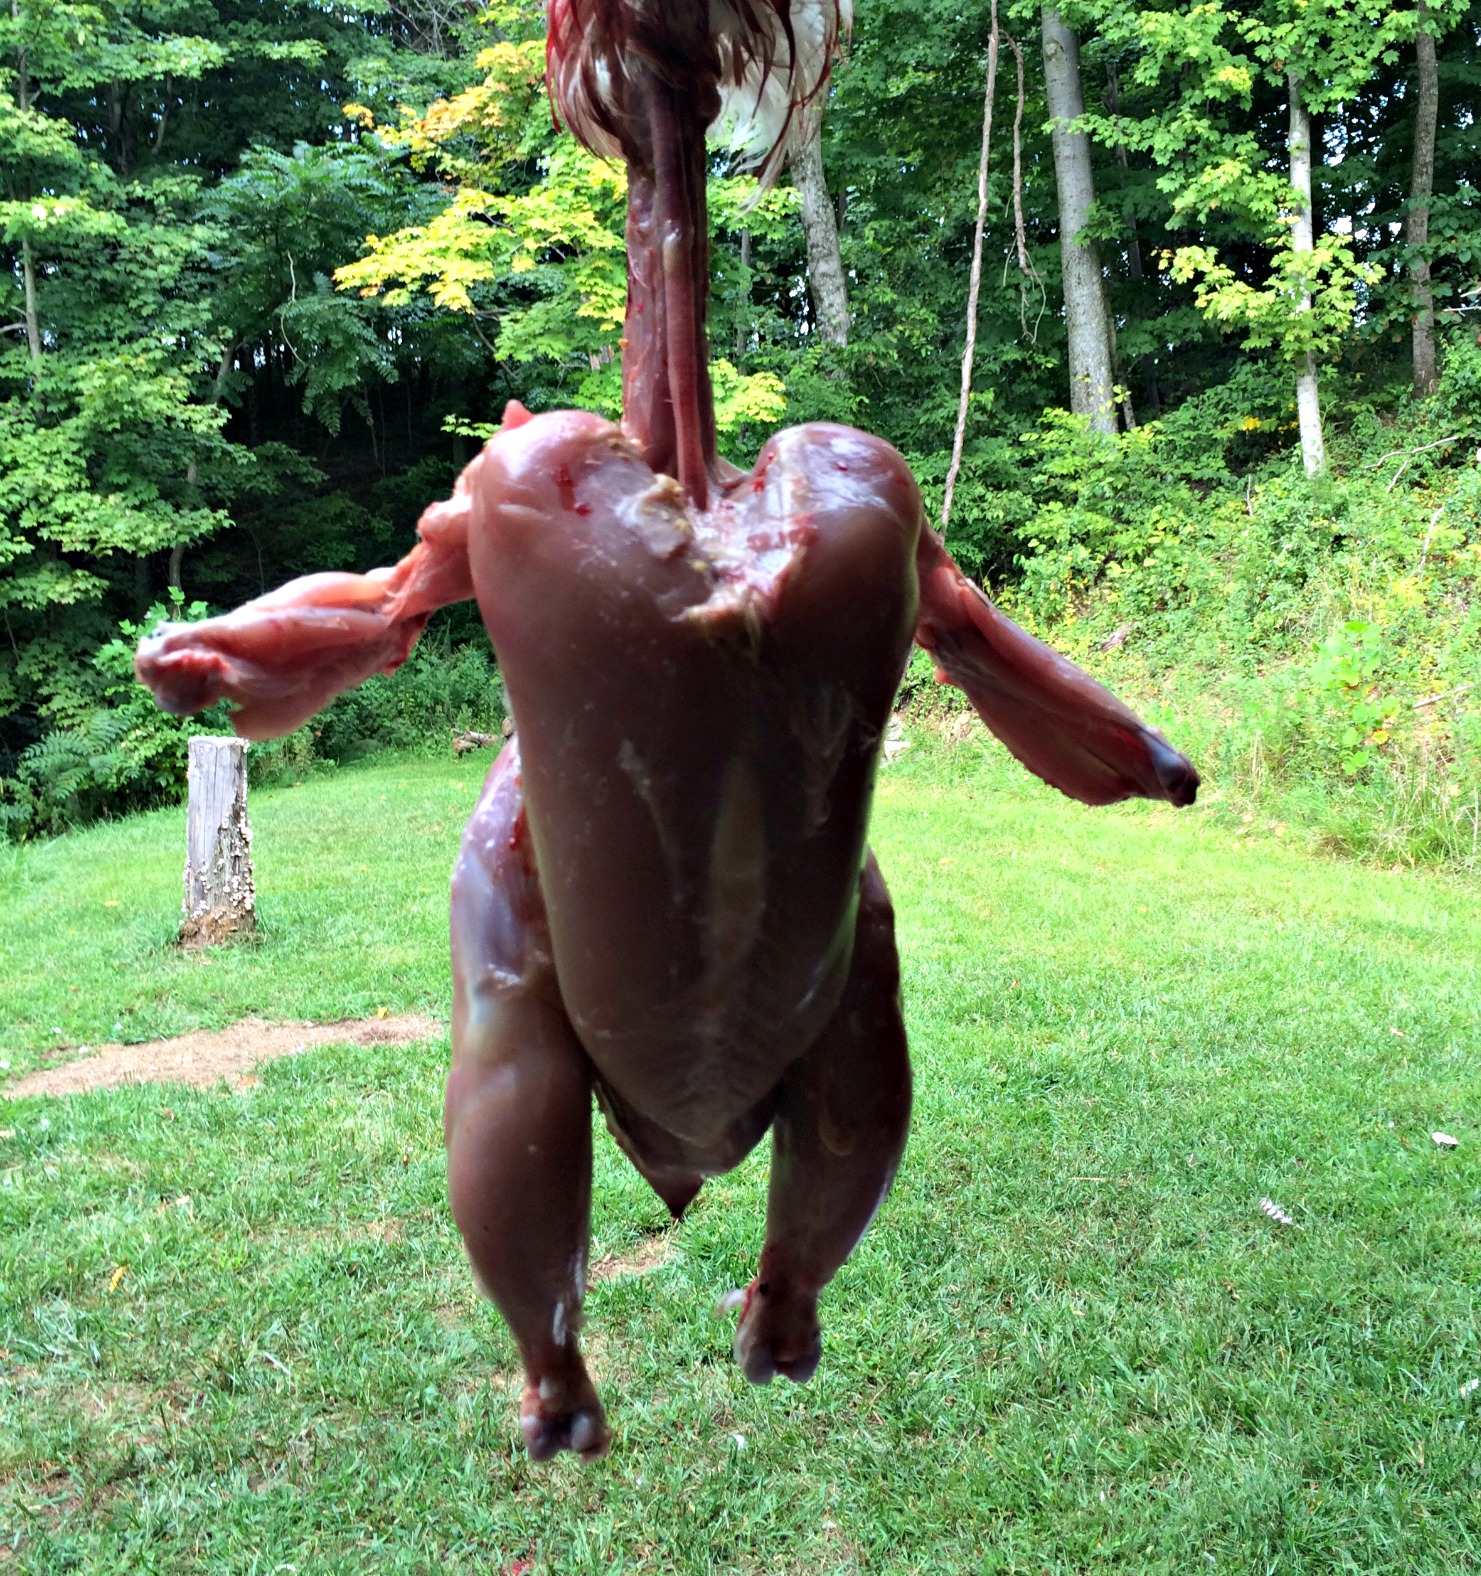
STEP THREE
Remove inside parts (the guts).
This is when a nice, clean work space comes in handy.
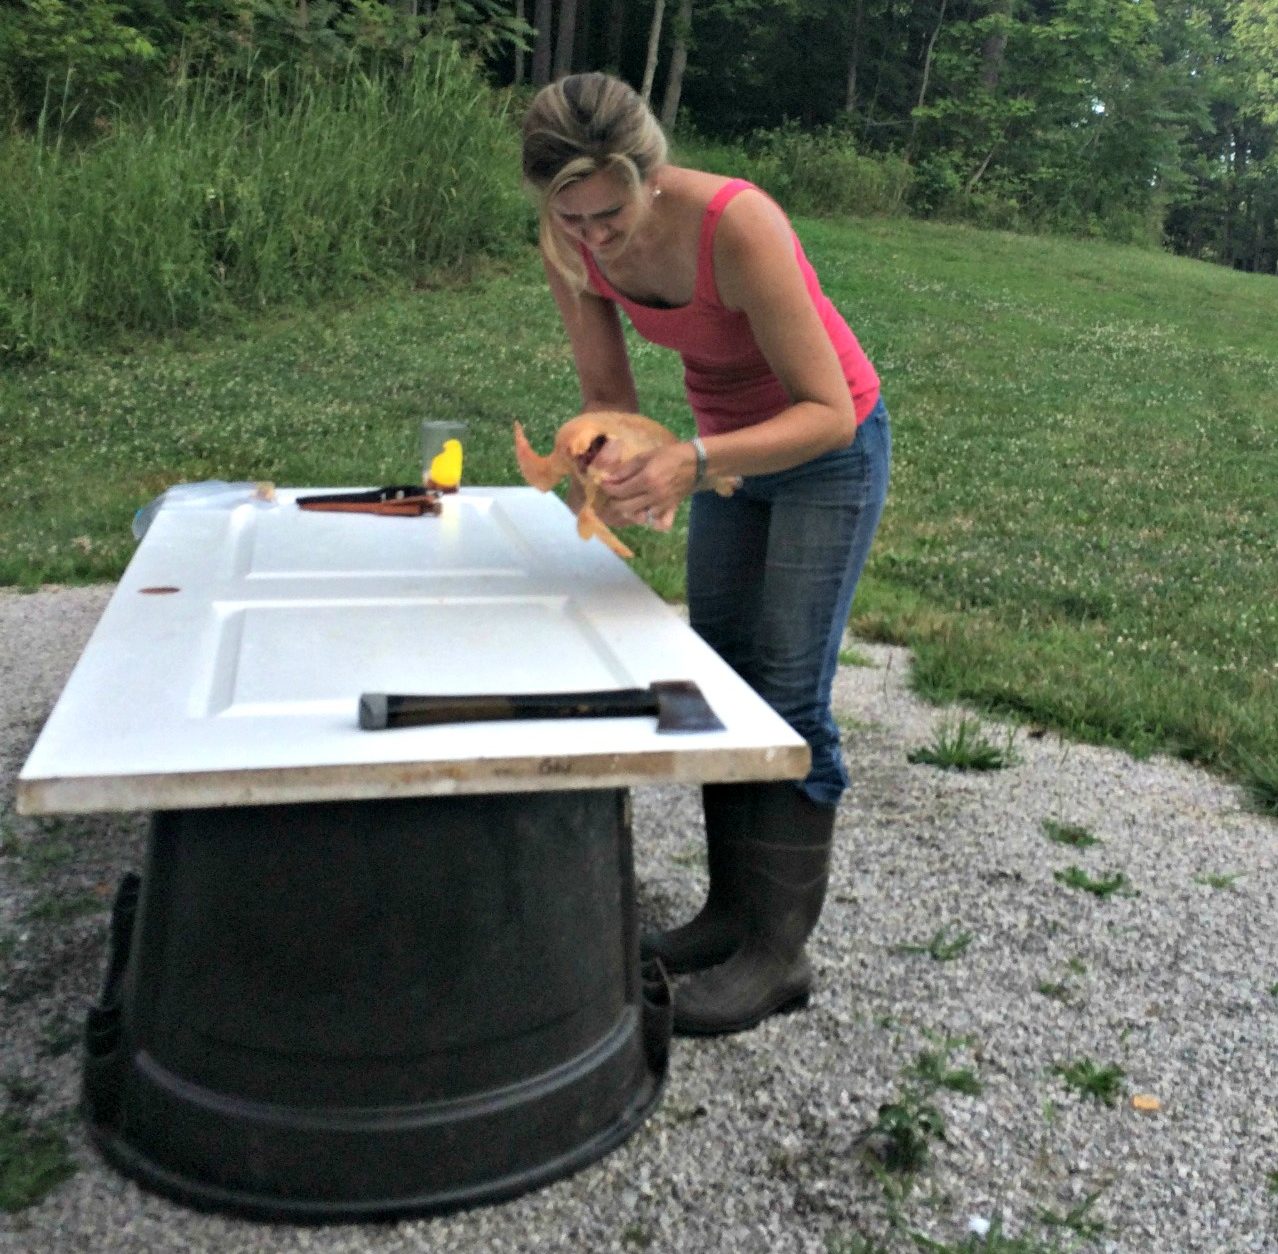
We have used a giant, upside down stock tank with a door sitting on it. Worked fine.
We have also used a high work table (pictured above). It was a much more comfortable option.
You can see that we have plenty of space to work. We have bowls filled with ice to put the hearts /livers/ gizzards/ necks/ or other parts you are saving into. We have buckets under our work space to catch feathers, crops and guts. We have all of our tools at hand. This is the ideal set up.
To remove the guts:
You can do this from 2 positions.
- Lay your bird on a flat workspace (like the table pictured above) or
- Hang your bird from something
Here’s the deal – the table is the best way to go.
- The table more comfortable. If the table is waist high you will be comfortable, relaxed & able to process hundreds of birds. Holding your hands out in front of you body for 4 hours while you process dangling chickens
maywill give you neck, back and all sorts of pain. - The table is stable. On a table your bird will be stationary. When a bird is hanging it is a moving target. An uncooperative, gross, moving target.
- The table gives you places to put things. You will have somewhere to place your knife or other tools when gutting. You will also have a place to put your bowl to catch parts you are saving (hearts, livers, etc). If you are standing under a tree with a dead chicken, it’s tough to figure out where to set your knife so you can pull the guts out.
So, we like to use a table workspace. This one is perfect. It’s high. It’s old. It doesn’t matter what happens on it.
Let’s do some gutting!
First the Crop.
To get the crop (where food is stored) you go in from the top. This is easy. It’s up at the neck under the skin. It is a little sack with some cords that look like tubes attached to it (esophagus). I do not use a knife to get the crop. I use my fingers to separate it and yank it out.
To get everything else – You want to go in from the bottom. The tricky part is that you don’t want to bust open the inward parts (especially the intestines) while you are removing them….. or else you could be covered in fecal material. Ick.
Likewise, you don’t want to bust open the crop or the gizzard either. You’ll be sorry if you do. Good times.
Helpful hint: when you “open” the bird on the top or the bottom – cut shallow. Take your time. It’s not hard.
I have personally gutted lots of chickens. It would be easier if you came over & I showed you. Since, that’s not realistic, I’m going to do my best to explain. The net-net is that I am going to shove my hand in the chicken along the top of the cavity, go back as far as I can, scoop my fingers down and pull everything out at once.
Here’s the details:
- Lay your chicken on the table breast side up.
- Your hands are your best friends when removing the insides of a chicken.
- I carefully cut a slit in the bottom of the bird, just big enough to get my hand started inside.
- Once I can get my fingers in, I use my hands to open up the cavity. Hands don’t usually bust intestines.
- As shove my hand in the bird, my hand is palm facing down. I am scraping along the top of the breast cavity (just under the breasts). Continue following the breast plate until you can’t get any further, detaching and “scooping” all the insides as you go.
- After you make the “turn” at the top of the cavity (near the neck opening) cup all those guts with your hand and pull them all toward you
- They will all come out with your hand
- Check inside to see if anything was missed – if so, scrape it out & toss it all into your gut bucket
Done!
For all the gory details on removing crops, proventriculus (gross thing attached to the gizzard), guts and intestines – go here.
I believe a table is the easiest, fastest, less painful way to gut a chicken. If you don’t have a table or work space and must use the “hang it from a tree” solution. Here’s how you do it:
First hang it. You can hang your bird from a tree or barn rafter or other object, just get it in a hanging position.

Once you open the bottom of the chicken the insides easily slide out – just keep pulling.
Once it’s hanging, cut the bottom of the bird open, grab the insides and pull. It will all come sliding out.
Helpful Hint: This is when a bucket of ice water is handy. Just toss the hearts, livers, gizzards, necks and anything else you would like to keep into the ice water. This will keep them fresh and sanitary until you can get around to doing whatever you want to do with them. 🙂
I know some people put all the coordinating parts in the bags with each chicken (a neck, heart, gizzard & liver in each bag). Others prefer to keep all the trimmings separate for stock.
STEP FOUR
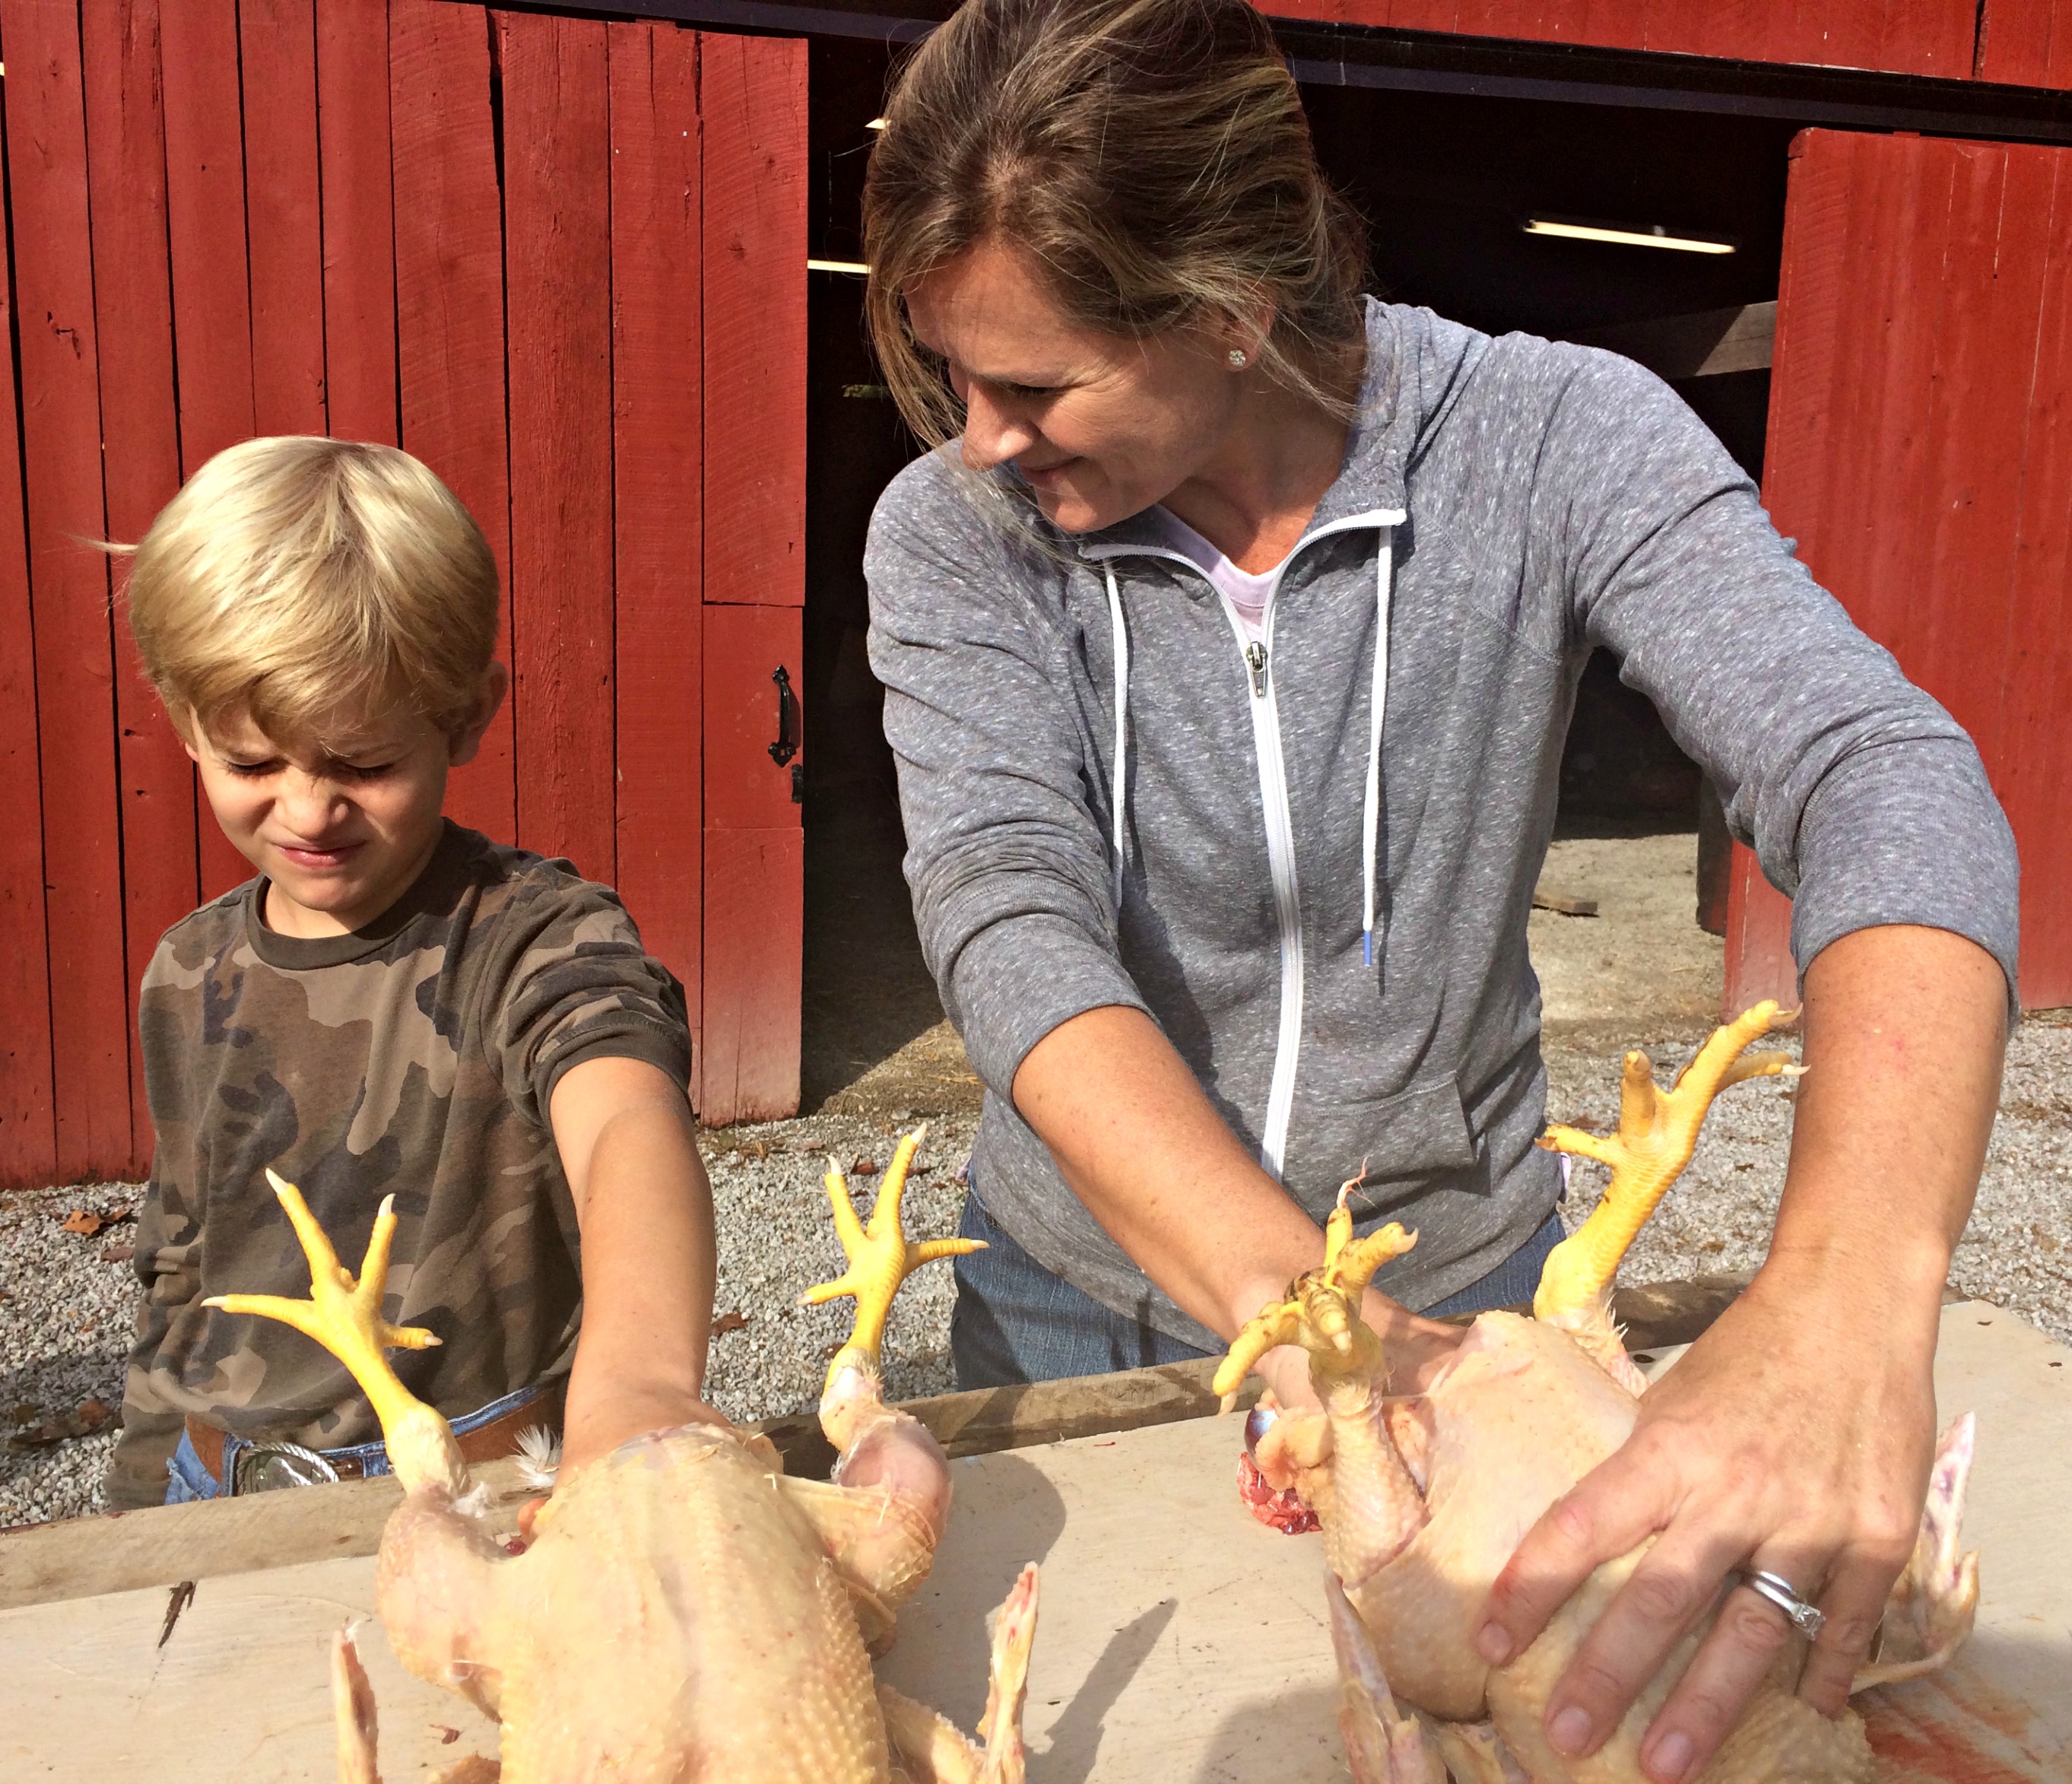
Use a knife to remove the feet & neck.
You could use a hatchet (my children’s choice) but it is sloppy and usually results in jagged sharp ends instead of nice round knuckles. With a knife you can be very specific and cut the feet off at the knee knuckle. This is what you want. This ensures a nice whole chicken that resembles what you are used to buying from the grocery.
First bend the knee at the knuckle, then carefully cut through the knuckle, removing the feet. The end result will look just like the chicken legs at the supermarket.
Removing the feet at the joints will also prevent the jagged bone ends that can potentially puncture holes in all your storage bags.
STEP FIVE
Wash & bag the chicken.
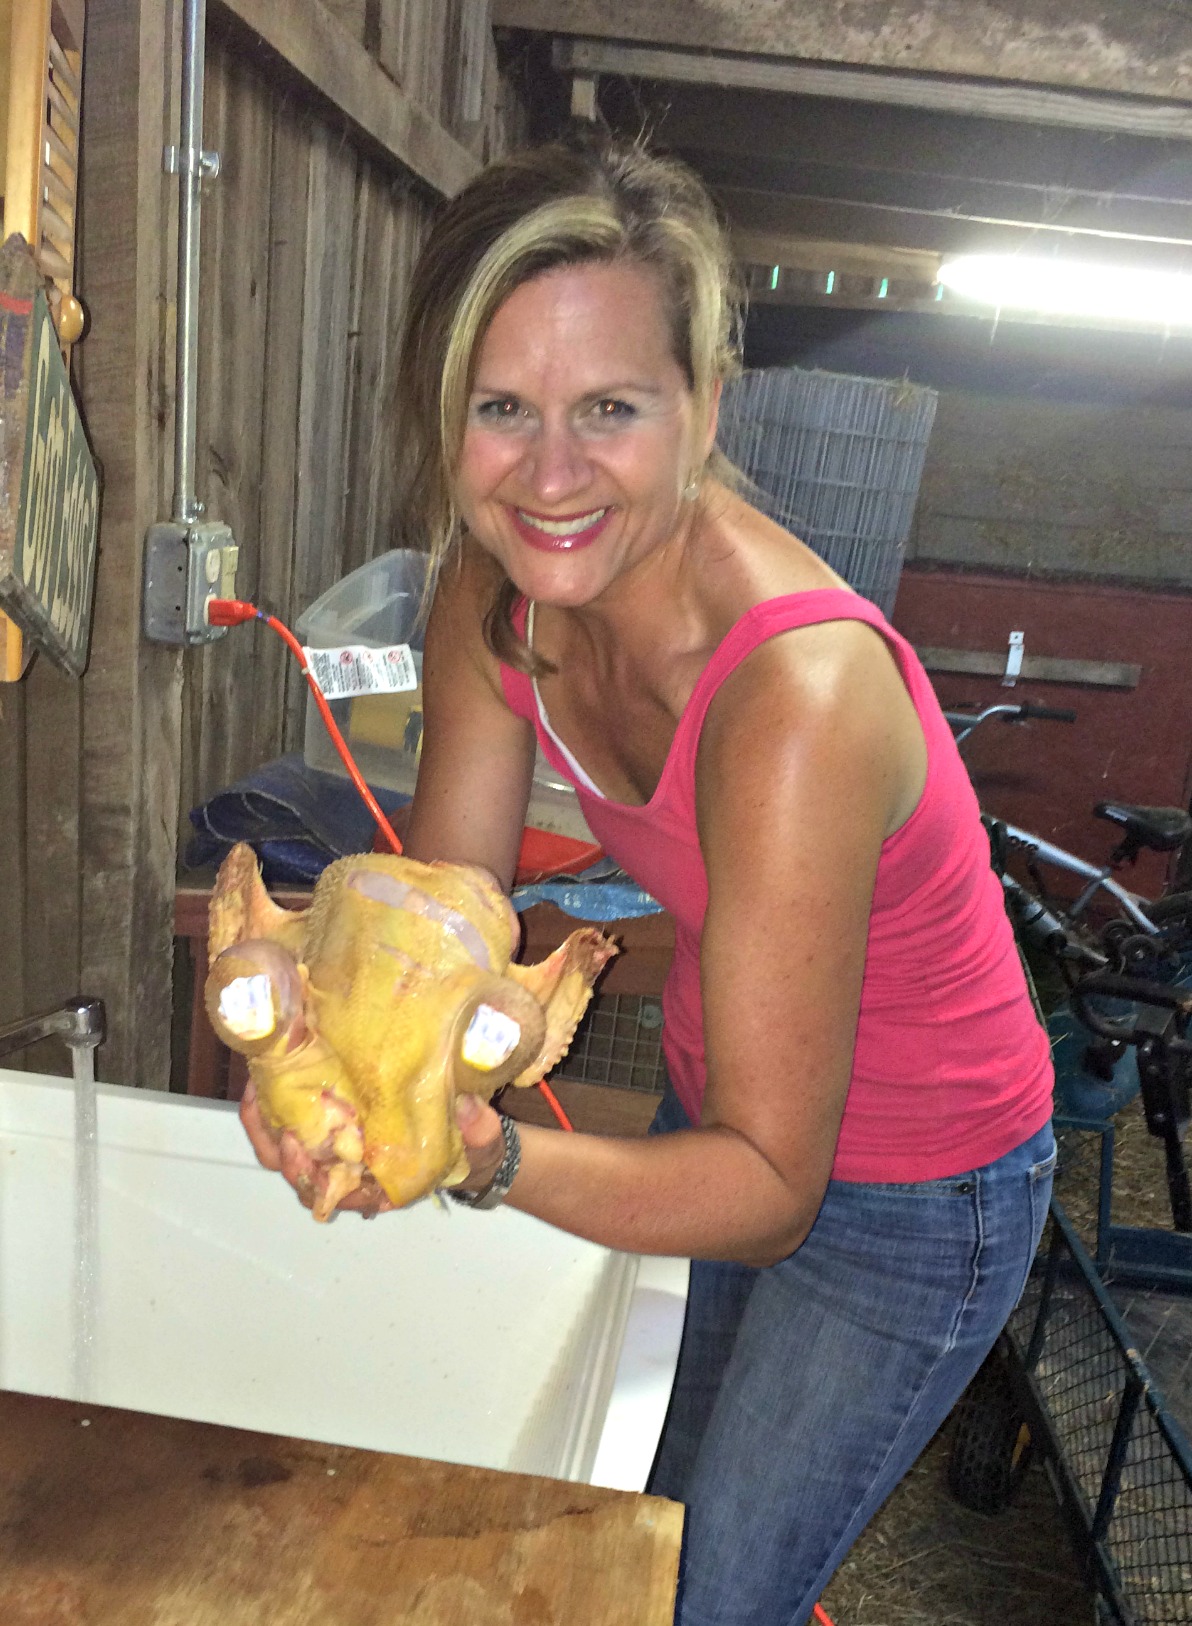
Washing a “just processed” chicken in our barn sink.
This is when you go over the entire bird with a fine toothed comb. Grab any pin feathers that were missed during the de-feathering step. Clean out the cavity. Make sure no inner parts were over looked.
When he’s finished you can dunk him into a cooler of ice to hang out while you process the other 19 birds, or you can go ahead and put him in a storage bag (or vacuum sealed) & transfer to a refrigerator.
It is an important step to let the meat chill in a refrigerator for a day before moving it to the freezer for long term storage. It will improve the meat and net you a better tasting, better textured, finished product.
To see chicken butchering bloopers go here.
For a delicious chicken dinner go here.
To get old fashioned advice, farm tips and recipes each week: subscribe via email (here).
XO,
-Candi


