
How to Build a Milk Barn.
This post is a response to a reader request. Thank you for the question & please feel free to send yours (here). I love reading your emails.
If you are considering adding a dairy animal to your homestead, or already have one and need a fresh place to milk, this post is for you! If you don’t want to milk anything, but would like to see inside my Milking World – this is also for you.
How To Build a Milk Barn so The Cow Will Love It
As I walked around the milk barn deciding what to photograph, I found myself counting my blessings. I am so spoiled. DH may not milk the cows very often, but he has truly given me the most wonderful place for our dairy.
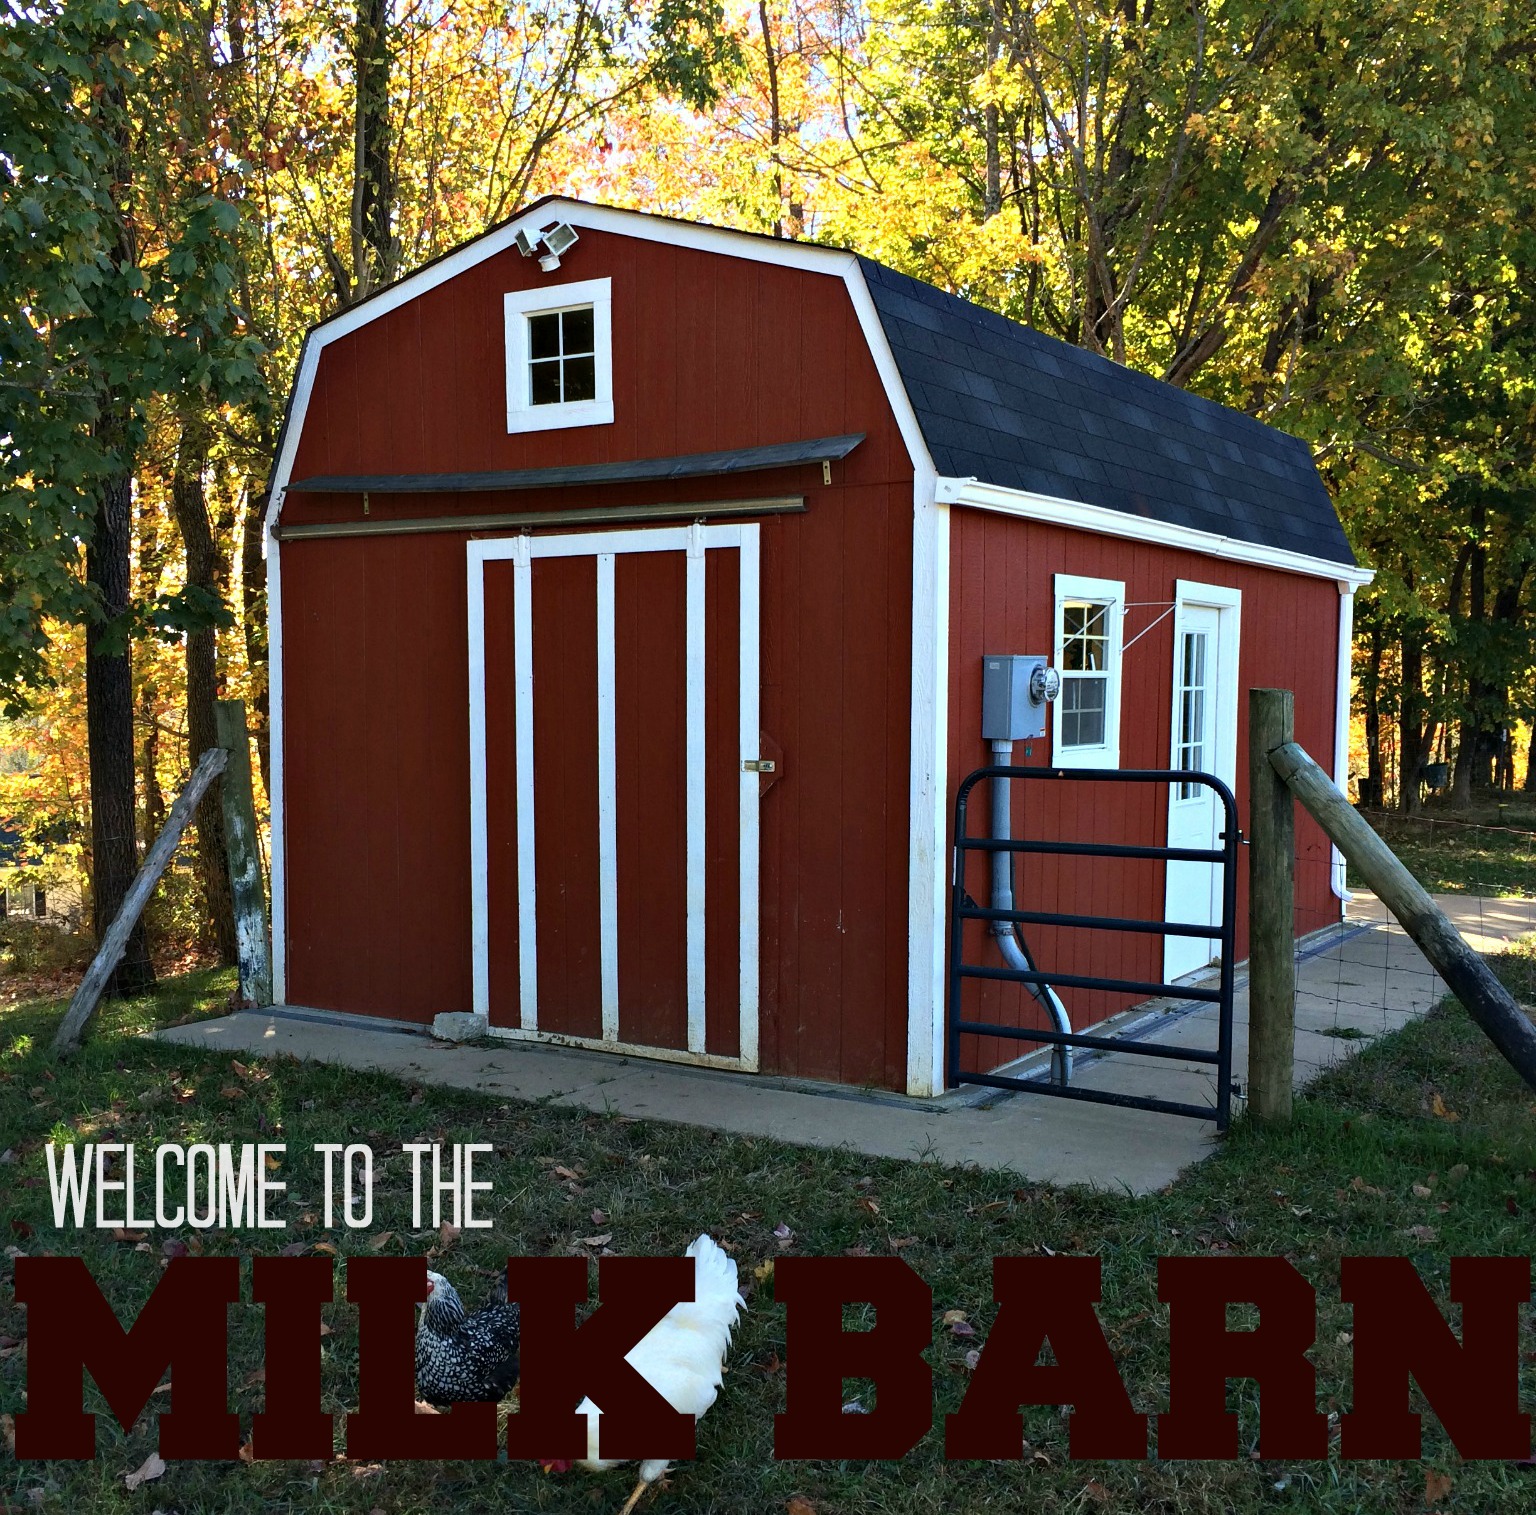
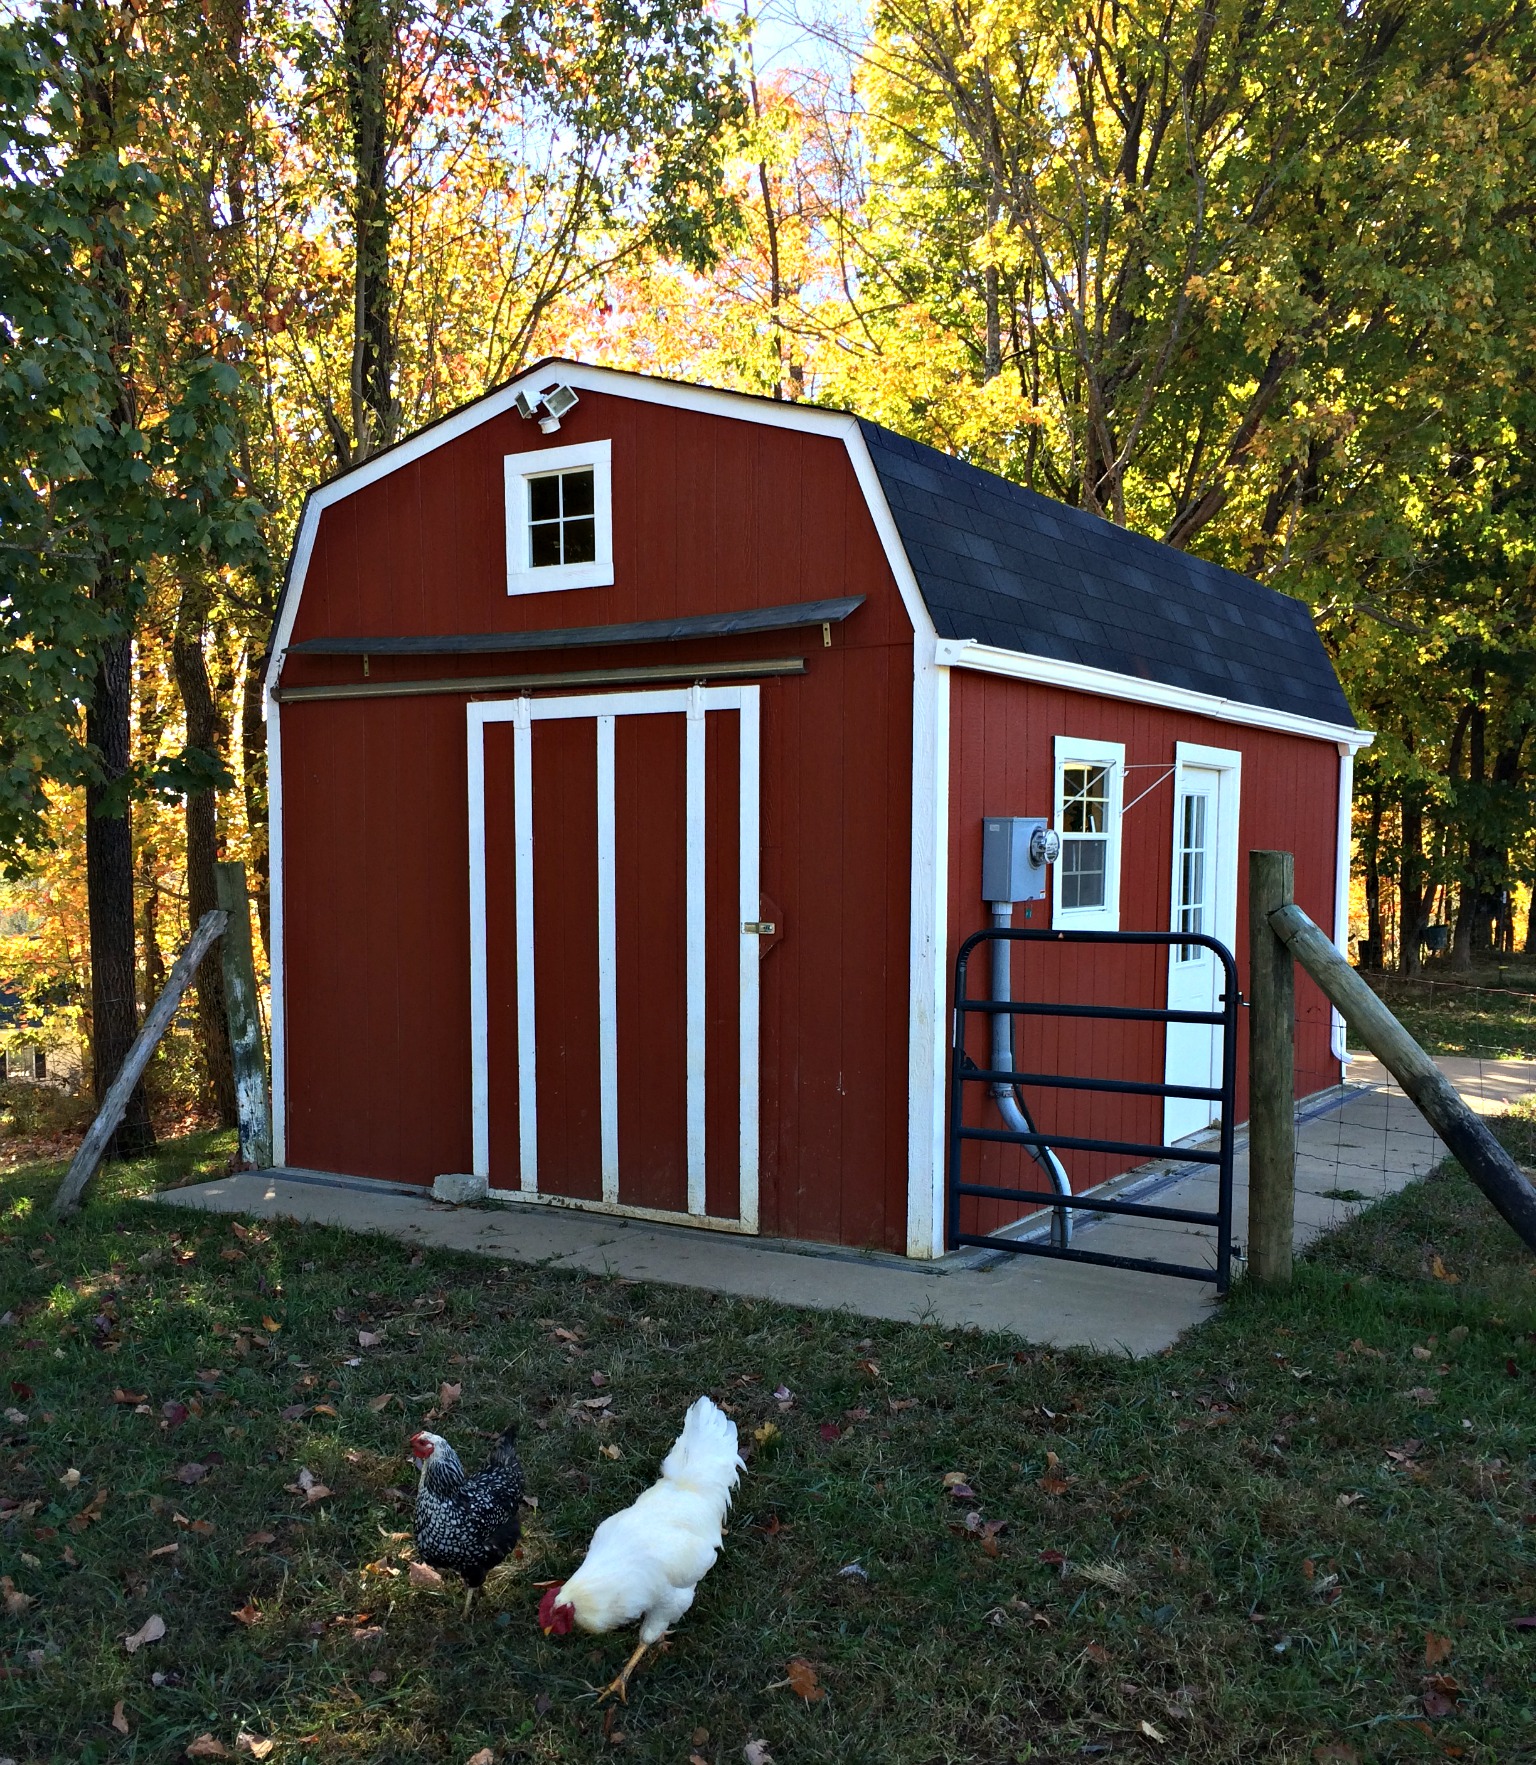
Our milk barn is 12 x 20. We hired a local guy to build it on site and it was very affordable. To get a wood building on the cheap check your local classifieds in rural newspapers and magazines. There are usually plenty of folks putting up “sheds” for a couple grand. The building is the cheap part – the fencing, concrete, electricity, plumbing, and cows are the expensive part.
I have been milking for a few years now.
This is so, so lucky for you because I can tell you:
How to build a milk barn that will make milking-time your favorite time of day.
Somethings are mandatory (like a lactating dairy animal and a bucket and a human). Somethings are not necessary but will make the whole experience a joy instead of a drudgery (like running water and heat).
I am going to assume that you want to milk in style and make it as enjoyable as possible for you and your sweet bovine.

Here is our milk barn. It is also called: The Cow Barn, The Milking Barn, The Milking Parlor, and Rosie’s Barn. We have a big sliding door on the end for the cow. I suppose our cow would fit through a man door, but that could be tricky.
This is a side view of the milk barn. There is a man door too. Rosie’s (sliding) door is off the left end.
We had a concrete slab poured for our milk barn. Cleaning cow manure out of gravel is impossible. I wanted to be able to hose or sweep out the barn. Therefore, we went with concrete. Be sure to have the concrete “brushed” before it sets. This creates a non-slip surface so you and your cow don’t fall down.
The sidewalk was an afterthought. There was a minimum charge for the concrete truck to show up. It didn’t matter if we got a 25 X 12 slab or a 30 X 17 slab – it was the same price. So, we got a sidewalk for free.
Come on in! This is where we milk Rosie. There is a half-wall dividing the milk barn into 2 areas. The cow area – and the other side. The cow side is 9×12 and is used for milking. The other side is 11×12 and is used for washing, storing, cleaning, bottle preparing, and everything else.
We do not use a stanchion or head-gate to milk our cows. We never have. Jerseys are sweetie-pies and generally love milking time. Our cows are spoiled rotten and are happy to stand still while we milk them. We just hook them to the wall.

On the wall, we have this steel rod with a ring on it. A lead (think dog leash) is tied to the ring. I just fasten the hook to Rosie’s harness.
This set up allows Rosie to move her head up and down while we milk her. She can easily eat her feed out of the bucket on the ground and lift her head up. She can not back up or move side to side – she can only move her head up and down. This keeps her still enough for us to milk her, yet allows her enough freedom to move, eat and be comfortable.
Some Handy Things to Have in the Milk Barn:
Milking Stools – Of course!
Whether you are hand-milking or using an electric pump you will need a place to sit. We have two because on days that we hand-milk, my daughter and take a team approach. She sits on the right, I sit on the left & we each grab 2 teats. Together we can milk a cow in just a few minutes.
Milk Gathering Tools
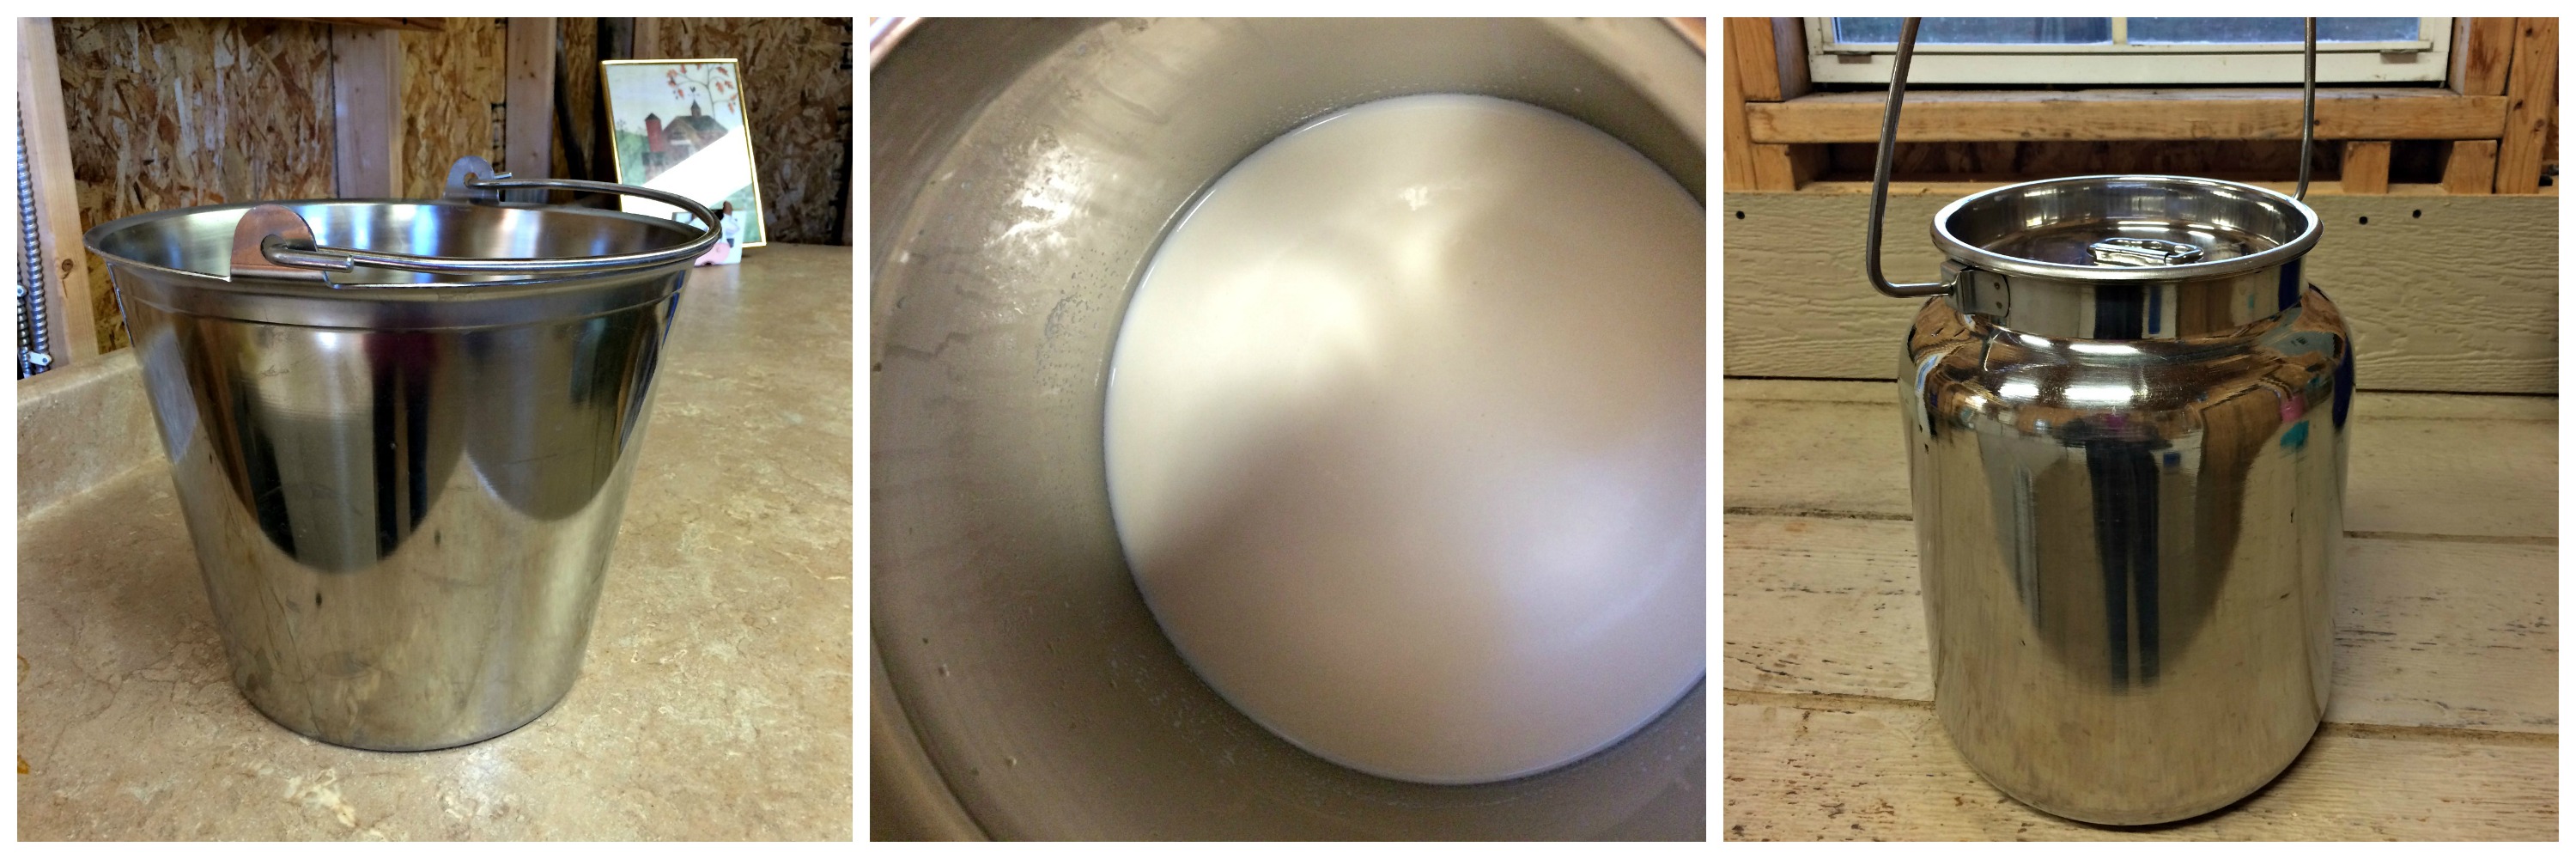
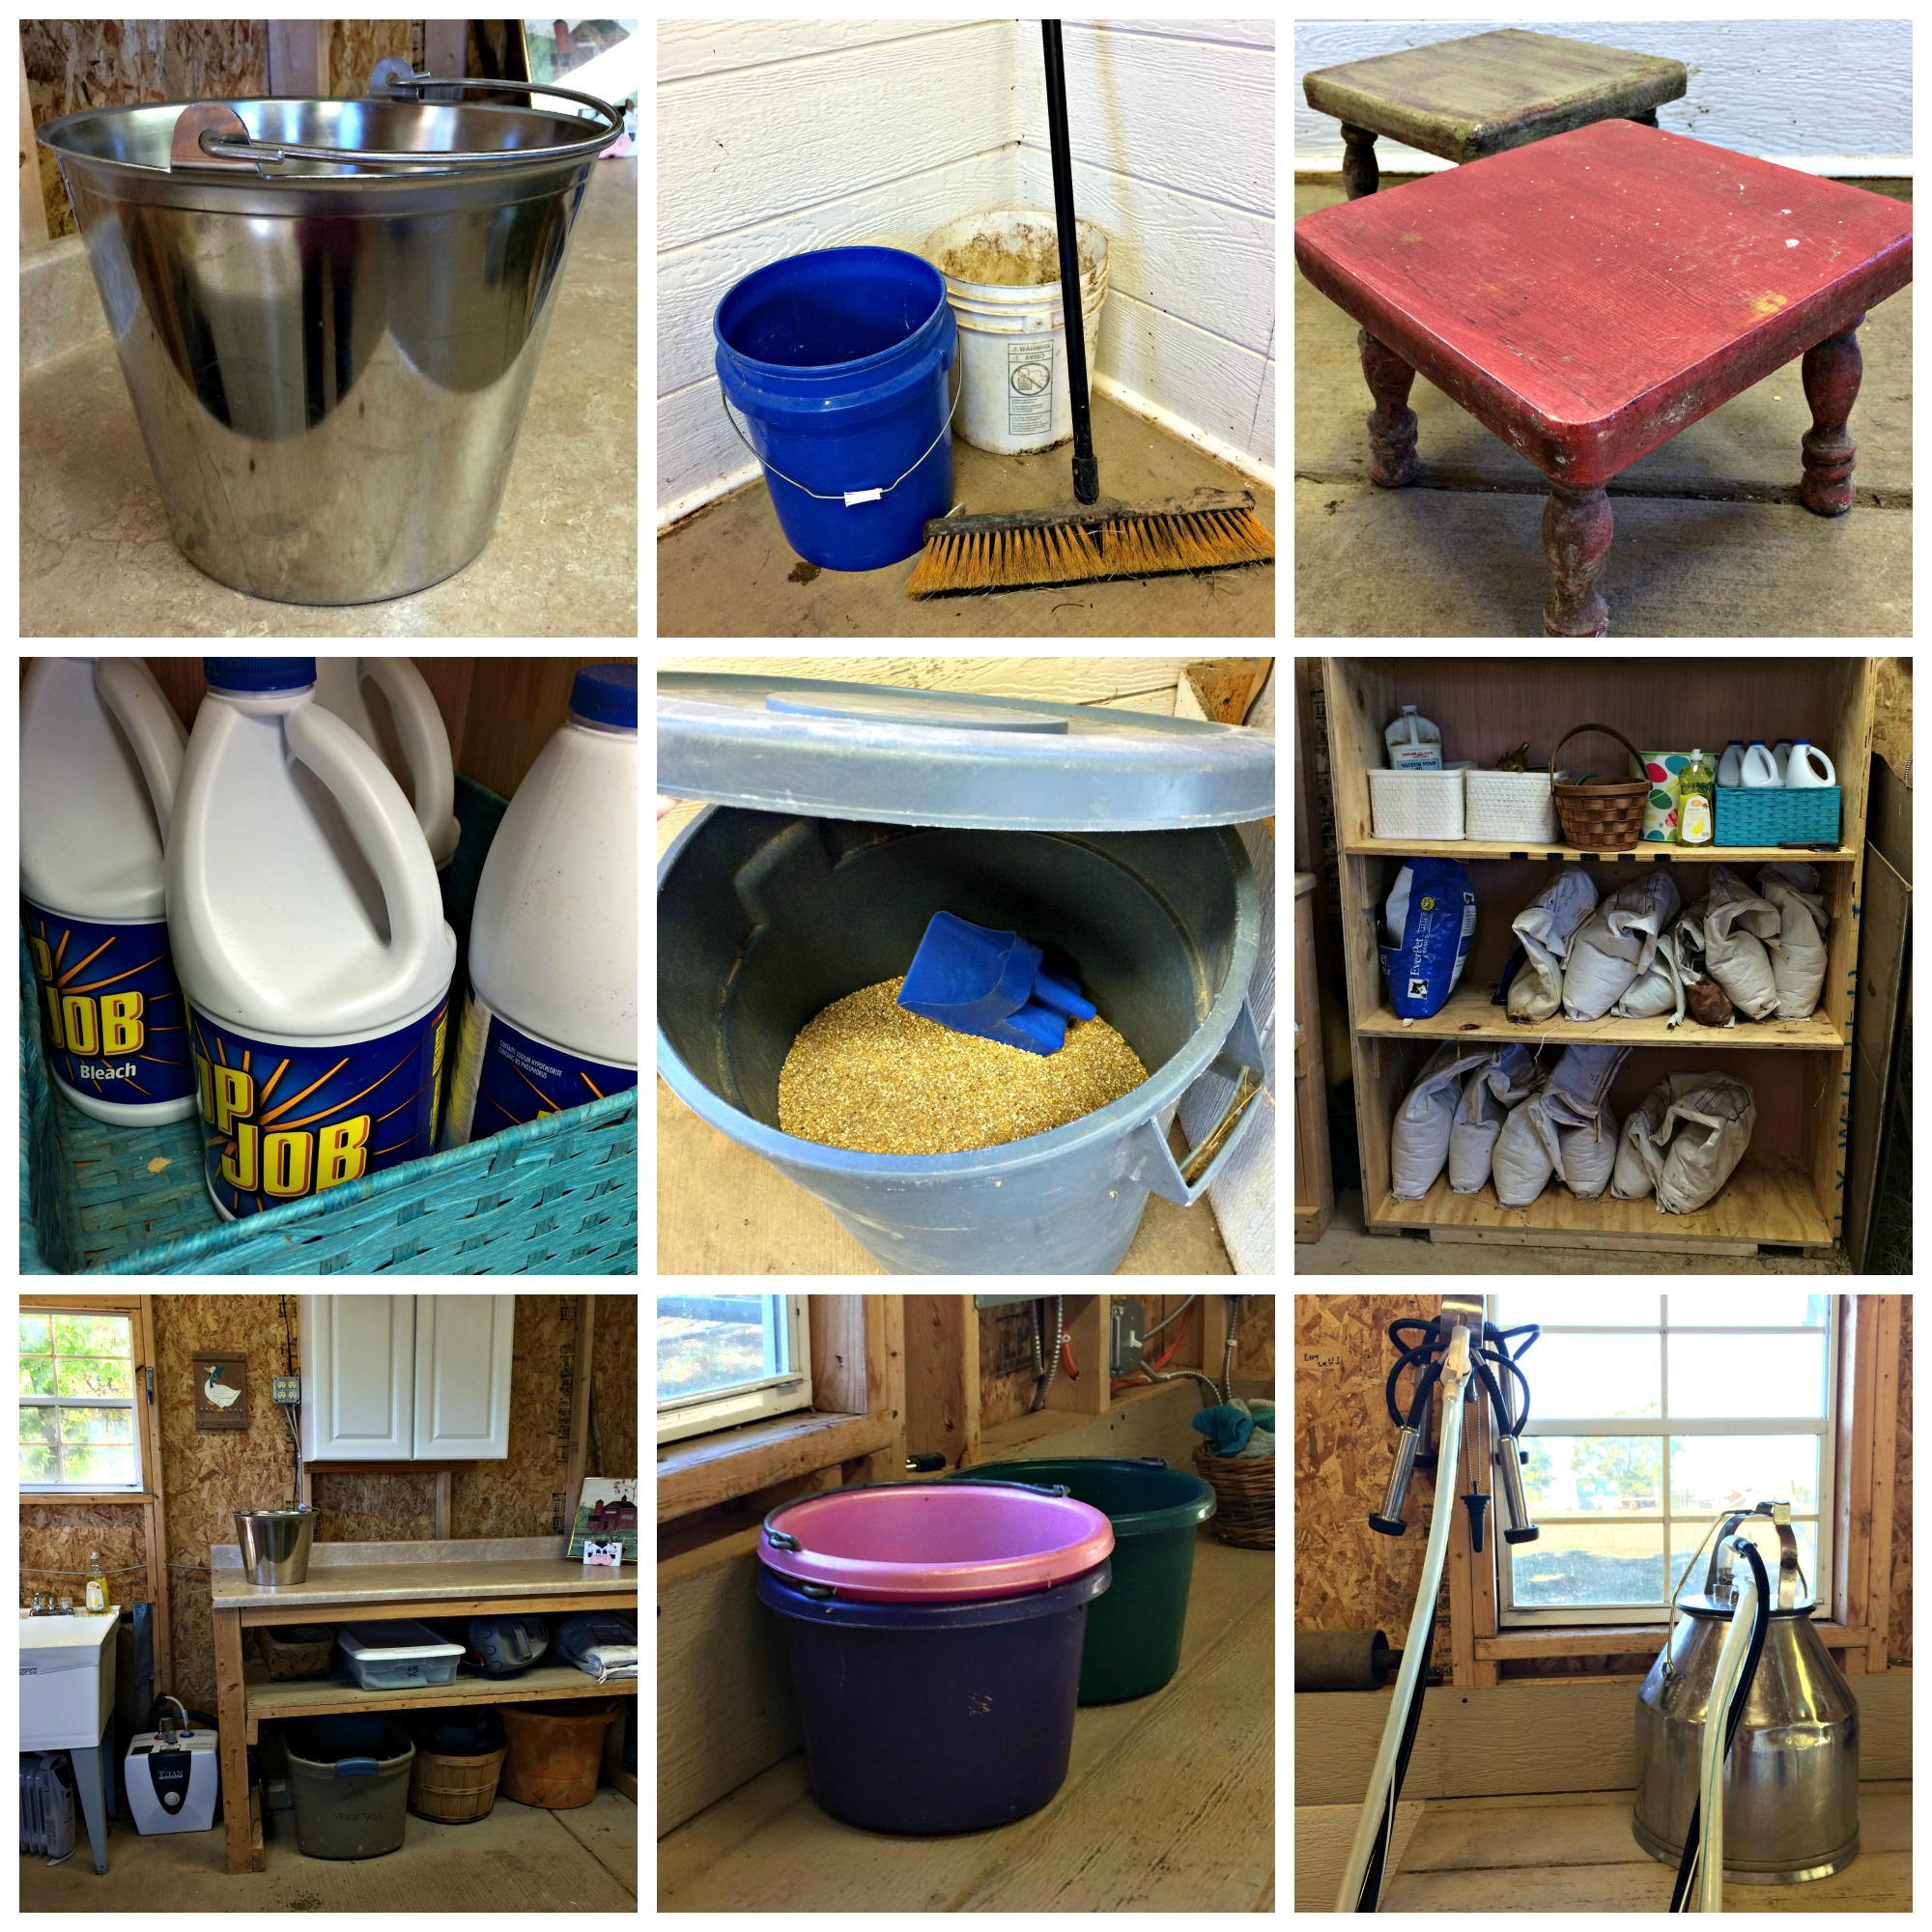
Once you plop down on your stool and get your cow all cleaned up and ready for milking, you’re going to need something to collect the milk in. This is where the milking pail comes in. Get one like this one. There is a nice wide opening at the top so it is an easy target. It is made of stainless steel so it will last forever (don’t waste your money on galvanized steel – you’ll be buying another one next year). It holds 9 quarts.
As you milk your cow the milk level will rise in the pail. The higher the milk line gets, the more likely the cow is to kick or step into your bucket of glorious milk. This is why you need a second container for your milk gathering. You’ll want a large milk tote (at least 2 gallons) with a tight-fitting lid and a handle like this one. It holds 10 quarts, pours beautifully and has a tight-fitting lid.
Once there is about a half a gallon of milk in the pail – I quickly dump the captured milk into the milk tote (the one with the tight-fitting lid). I continue the process until I am done milking and all the milk is safely tucked into the can.
The milk tote has a handy carrying handle so I can easily transport it to the house to strain and store.
Water
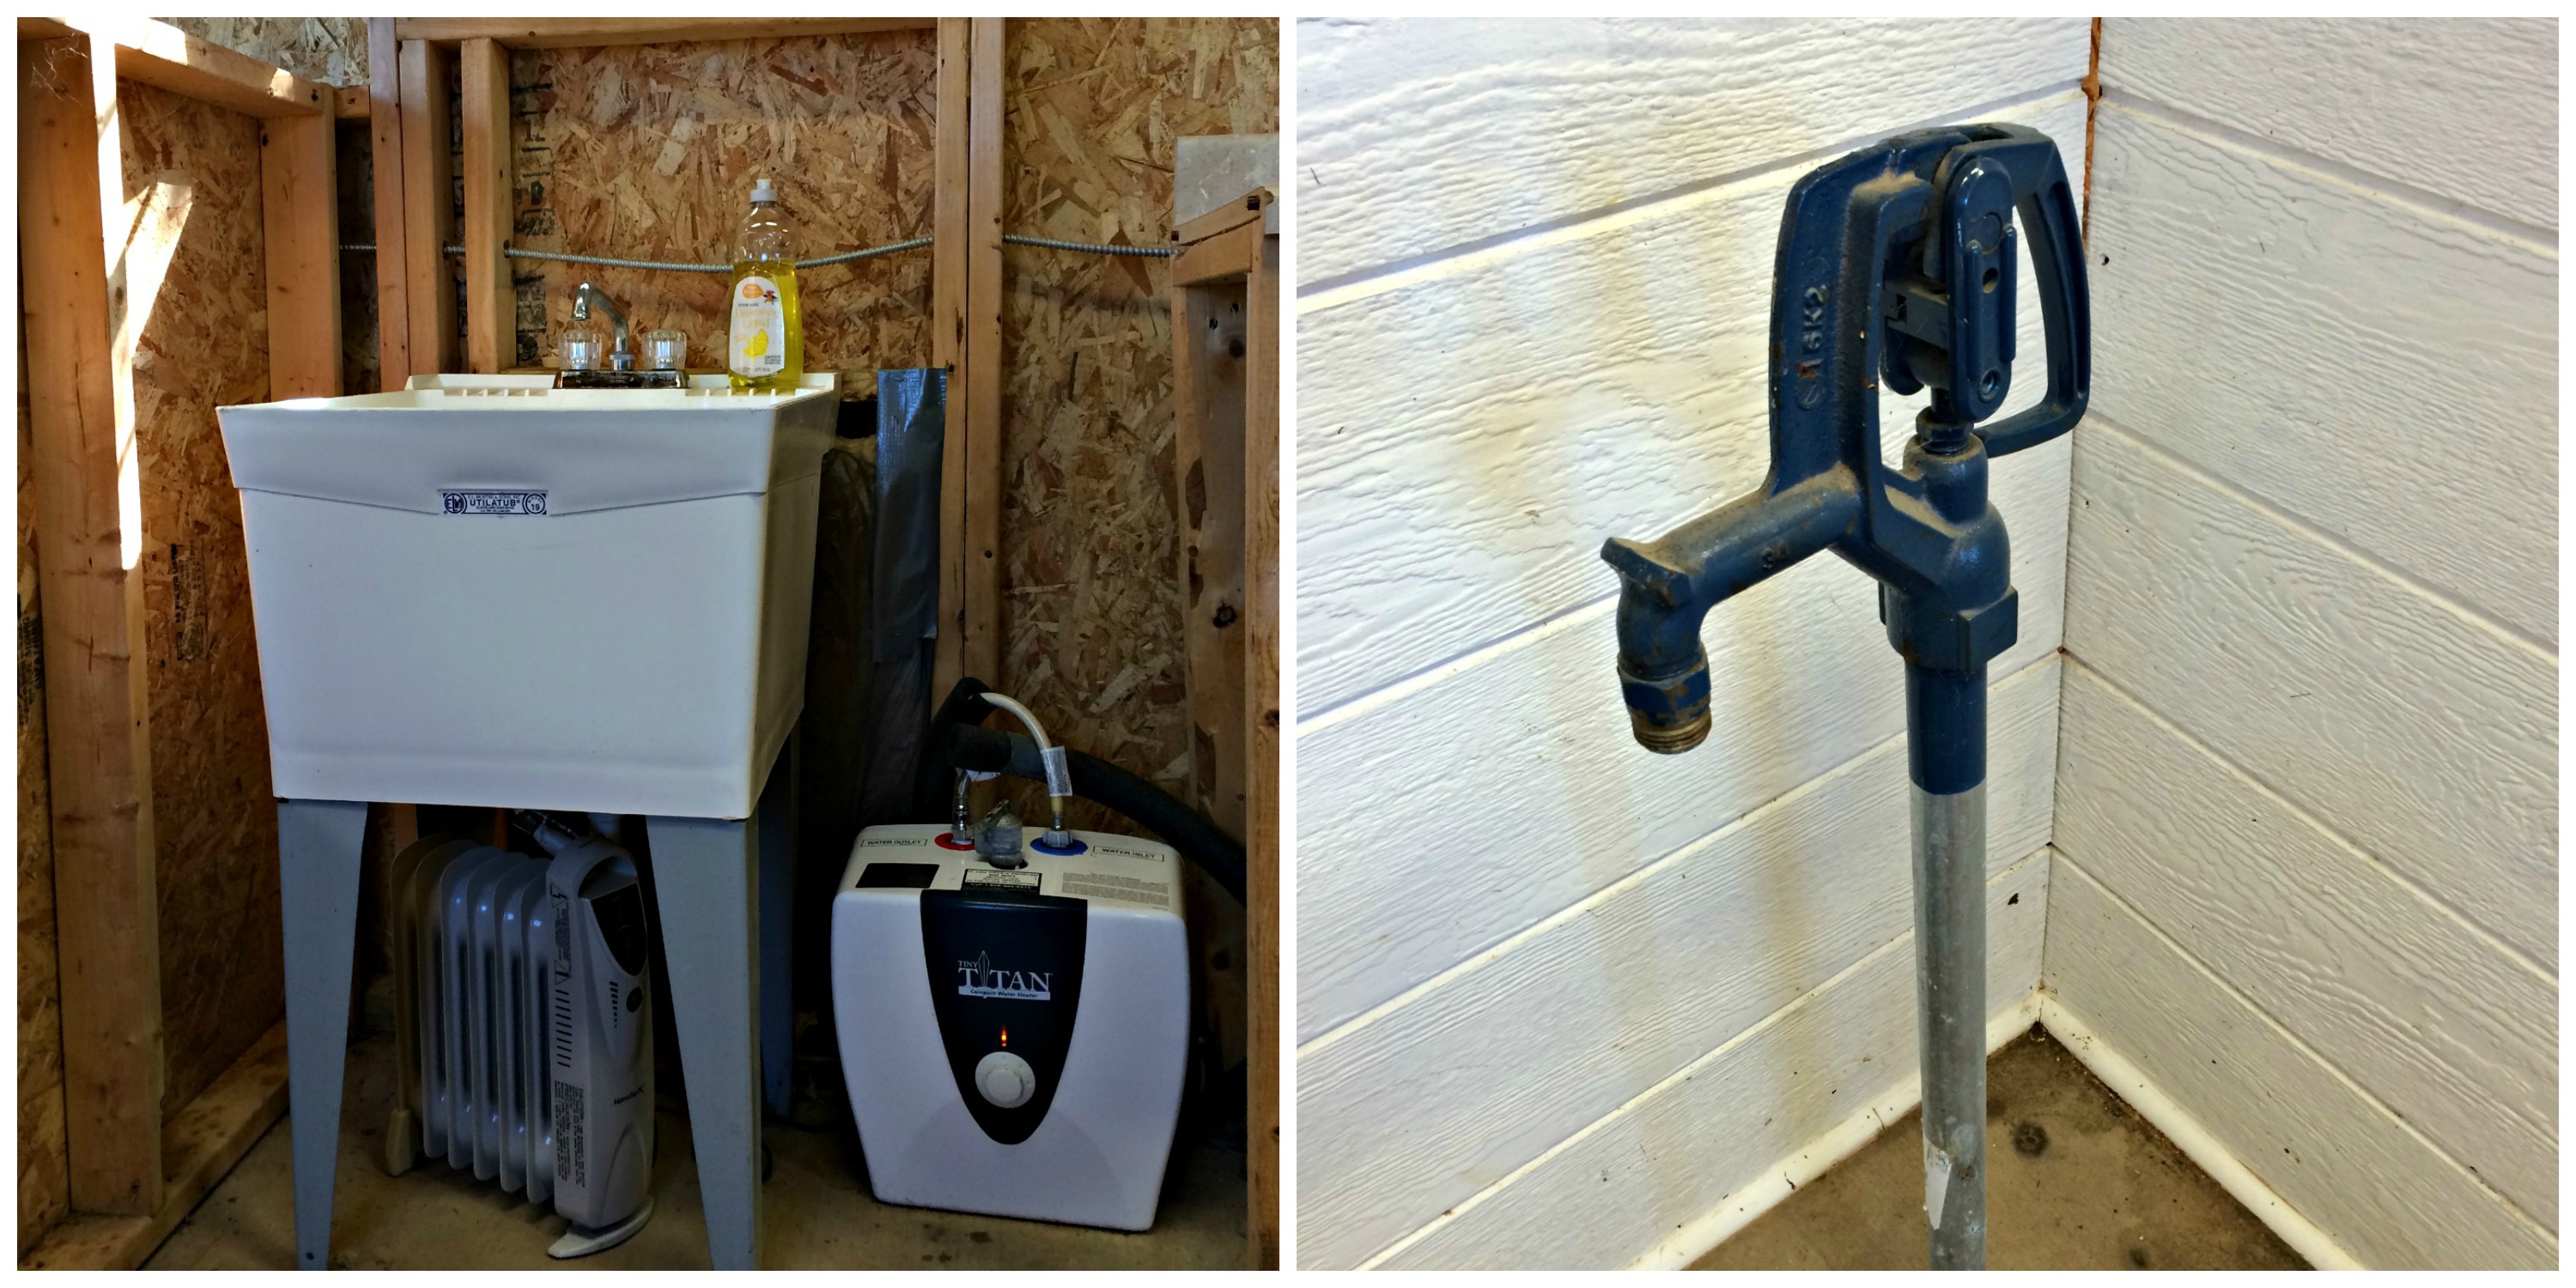
Whether you carry it from your house or you have a water source in your designated milking place, you’re gonna need water. Preferable hot water. We have a sink with hot and cold water and a frost-free pump (for when the sink is out of service) in our milk barn.
Why water? There’s an endless list of things that will need constant cleaning: the buckets, the teats, the electric milking components (if you have one), your hands, the bottles (for the calves), the floors, the walls, the counters.
You will need water. If you think you won’t need water because you don’t have calves or an electric milk pump – you should still consider installing water. Why? Because if you are like me, and you love cows, it is probably just a matter of time before things like calves (who need bottles) and milk pumps end up in your life.
I’m just sayin’, these things have a way of showing up.
Counters, Cabinets & Shelves for storage
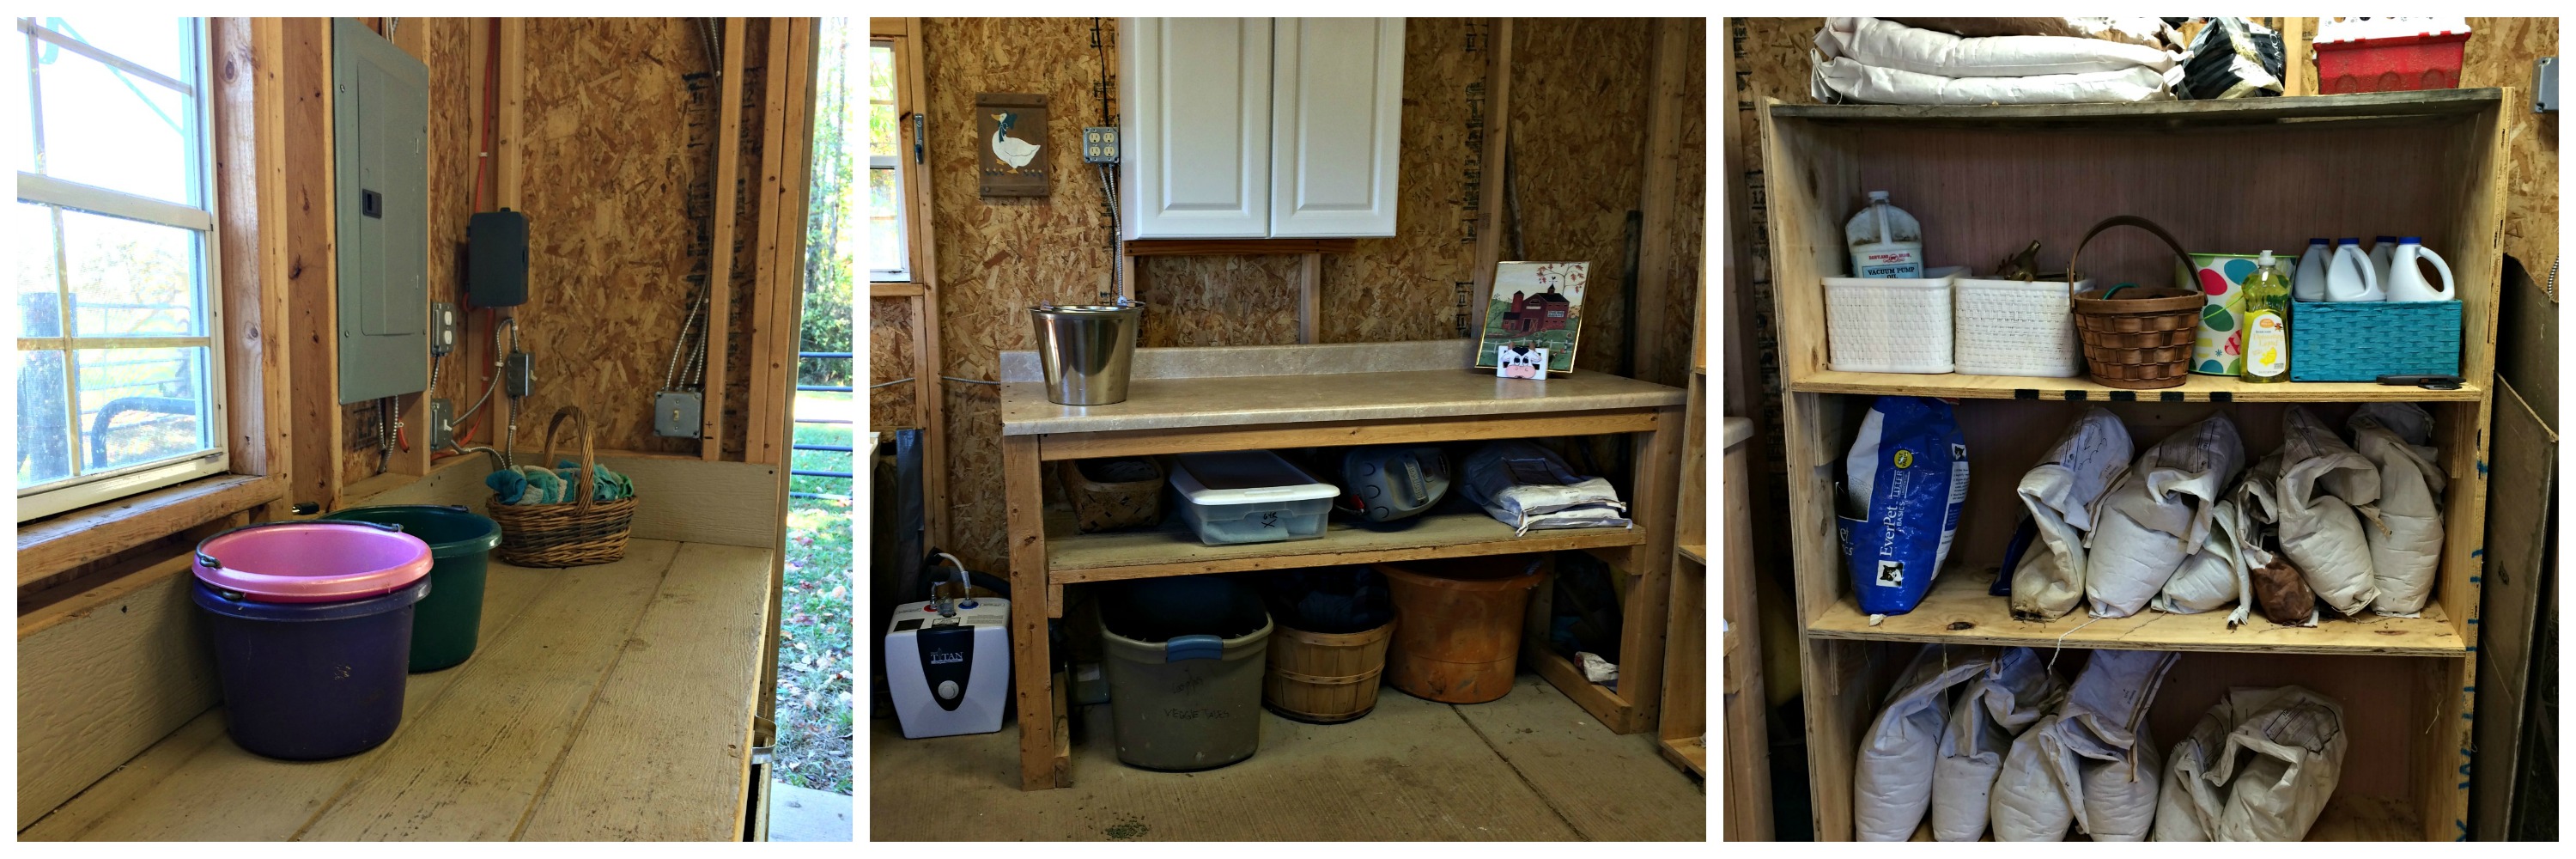
Cow brushes, Fly spray, milk cans, minerals, buckets, udder balm, iodine, bleach, alcohol, cleaning supplies, milk-replacer, bottles, washcloths, pulsator oil, etc will all need a home.
A few shelves and a counter will probably do, but if you have space, you will not regret putting in extra storage areas. We re-purposed some scrap supplies for most of our counters and shelves.
Buckets, buckets and more buckets
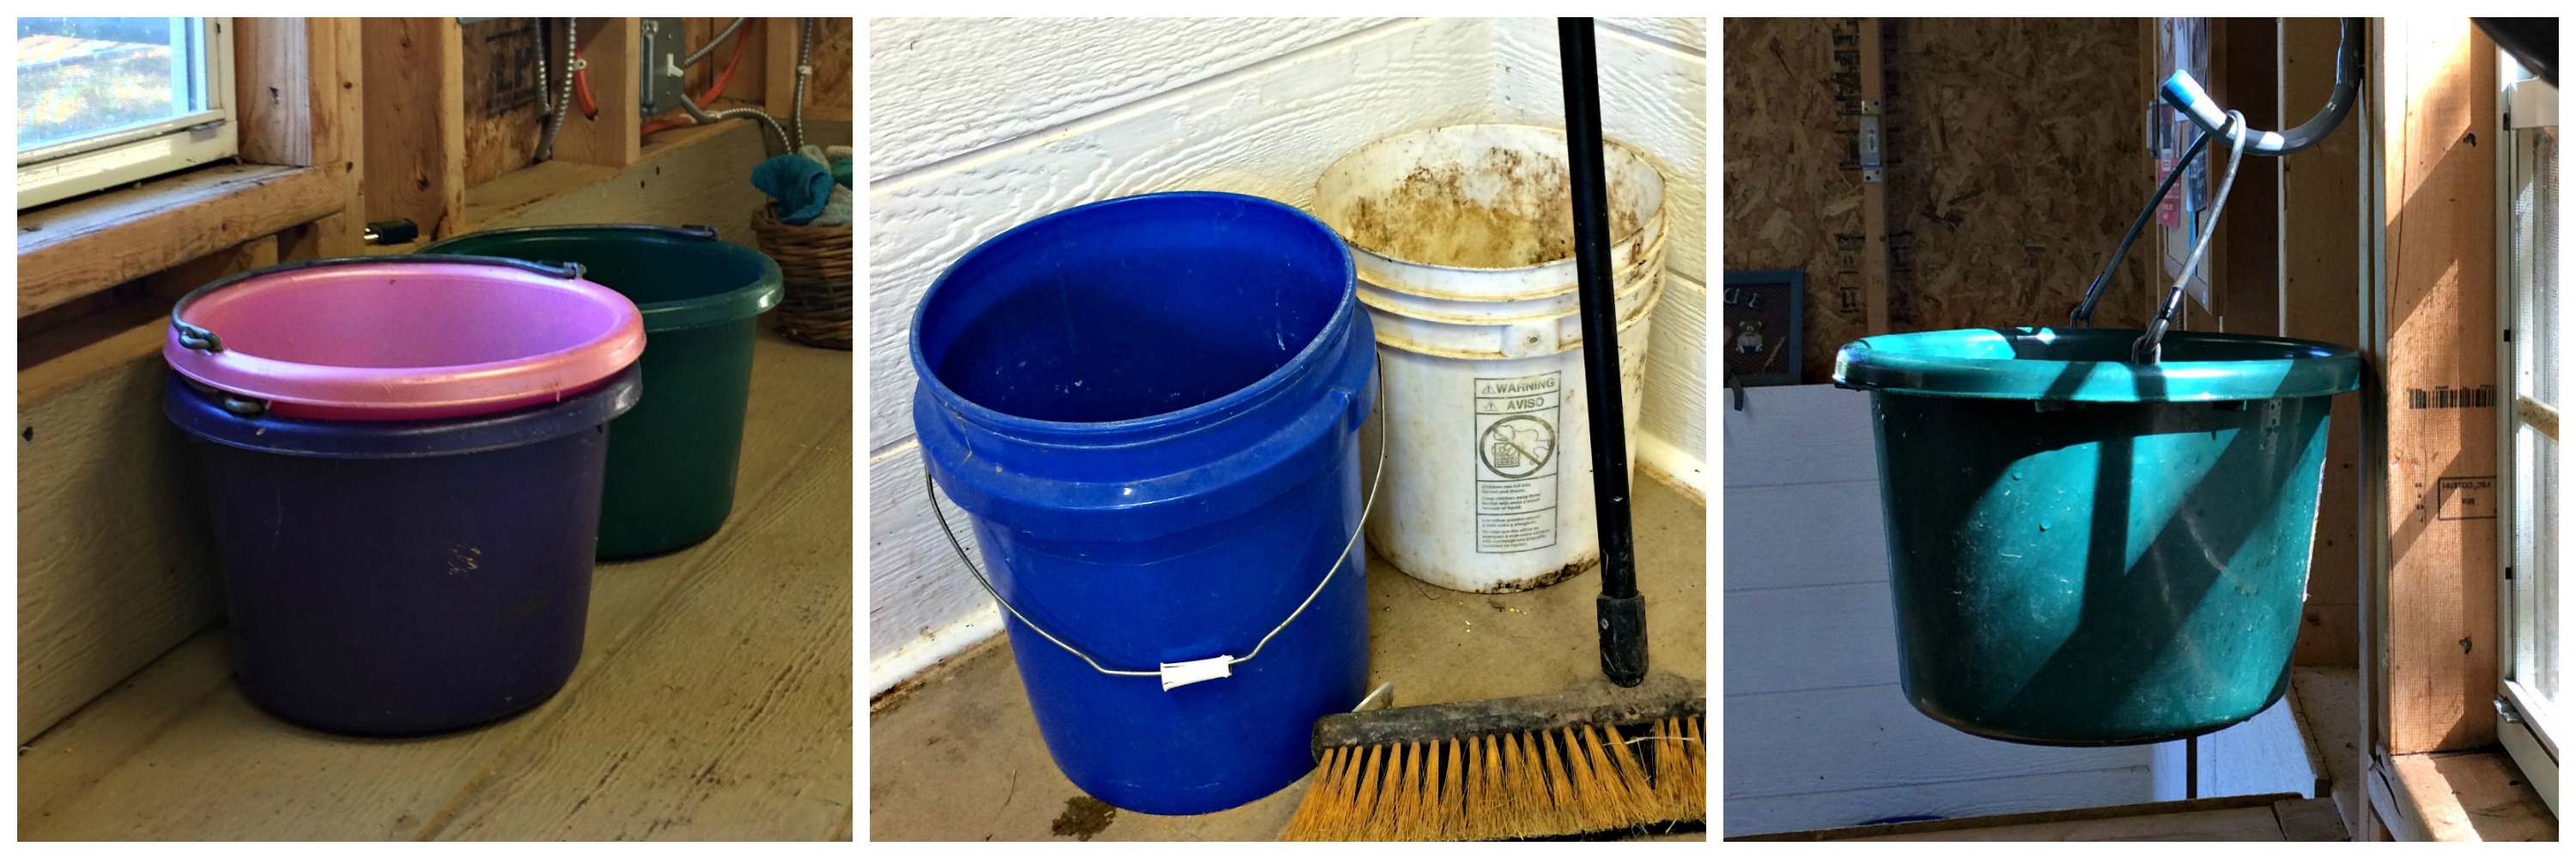
You will want poop buckets for catching poop and pee. You will want feed buckets for feeding grain. You will want spotless washing buckets that you only use for cleaning teats before milking. You will want flawless, rinsing buckets you only use for cleaning the milk pump (if you have a milk pump). Lots of buckets.
Can for grain
A little grain will usually keep the crankiest cow happy while you milk her (why I am pro-grain here). If you don’t put your grain in a can with a tight-fitting lid you will have a mouse problem and grain all over your floor in about a week. I like this one.
Using cans instead of having bags of feed all over the barn keeps things neater and cleaner.
Push broom
This is a simple supply that we use almost every day. If you have a giant door, a concrete floor, and a push broom there are few things that can’t be erased. On particularly messy days (like when the vet comes to rectally palpate the cow for a preg-check) I’ll dump the bleach water from the milk can straight onto the floor and push it all out with the broom – instantly clean!
Hooks
I have hooks all over the milk barn. They hold harnesses, leads, milking equipment and buckets.
It is important to keep the washing and rinsing buckets clean. One way to keep a bucket clean around here is to hang it up really high. If the bucket is hanging it is off limits for the kids to use for ducks, rabbits, frogs, or whatever else they have kidnapped and want to carry around the farm.
I also use hooks for the milk can, the claw, and the lid. When I am cleaning the electric milking parts I am constantly taking lids off and dumping gallons of rinse water. If I set a perfectly clean, bleached milk-can lid on a counter, stool, or anywhere else in the milk barn it would no longer be perfectly clean. Yuck. This is why I have hooks approximately every 18 inches in the milk barn. It gives me a place to “hang” something instead of “setting” it down. Everything stays clean.
4 Reasons Why I am insanely spoiled in my milk barn:
#1 Fan

We have a giant fan in the back of the milk barn. This fan does not blow air into the barn. It blows air out. In summer when it is 105 degrees outside and 115 inside the milk barn this fan makes it bearable to milk the cow. Because it is positioned at the end of the barn it draws all the hot air out of the barn and creates a breeze through the building.
#2 Frost-Free Pump
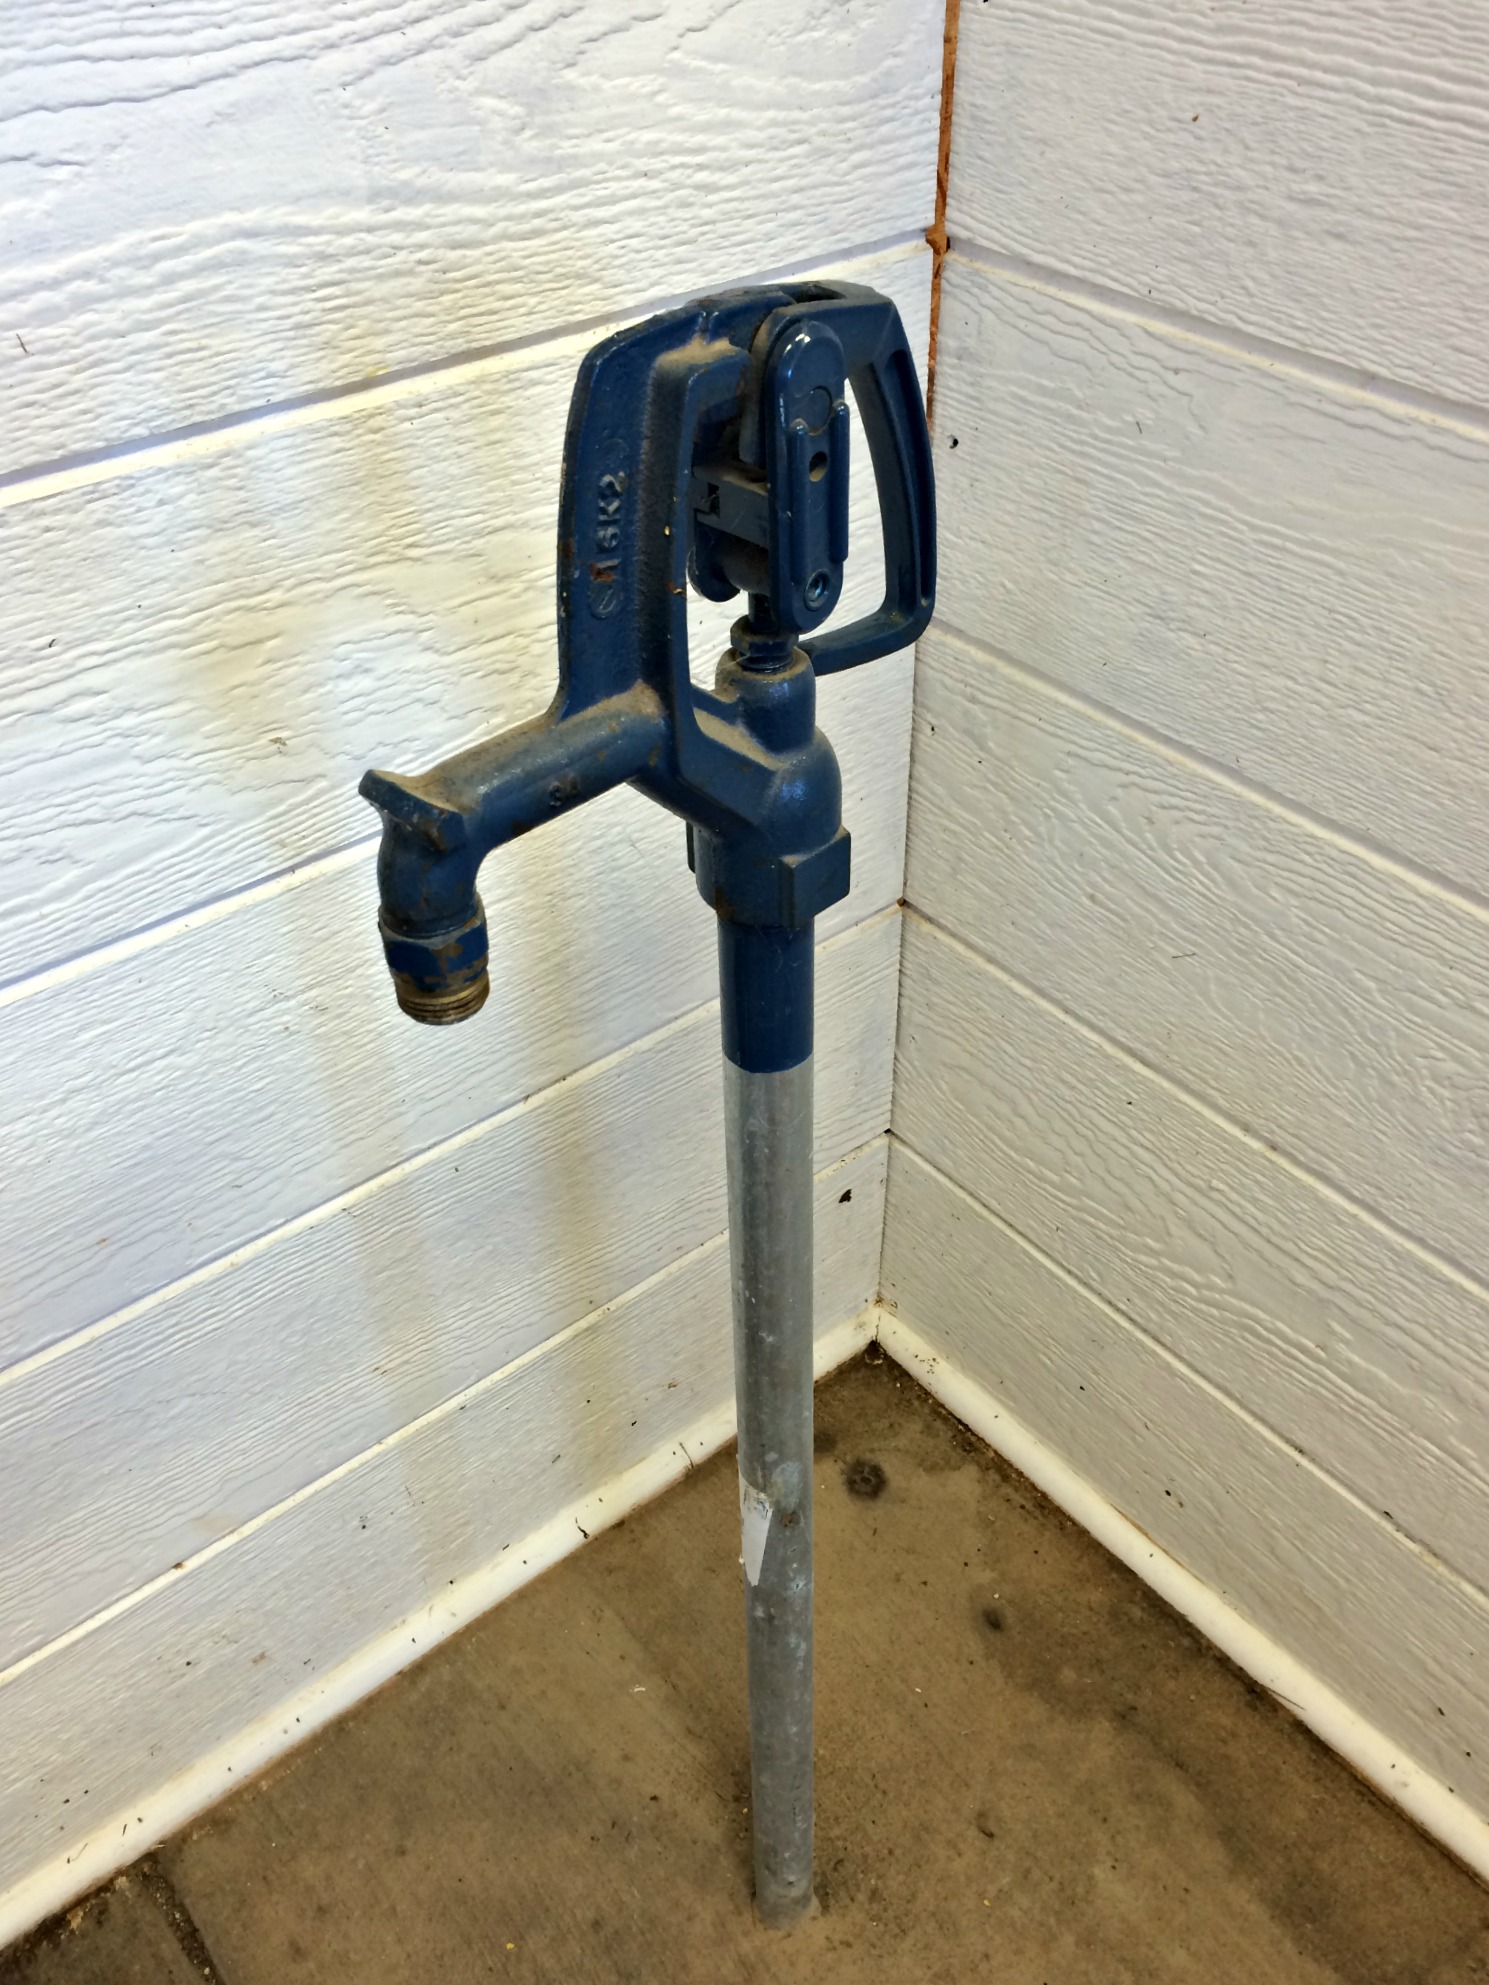
There are times in the deep of winter when the sink will not work. Even with insulation, a radiator, and hot water, when it gets crazy cold the sink in our milk barn is out of service. The frost-free pump does not provide hot water, but it is guaranteed water 365 days a year.
#3 Sink
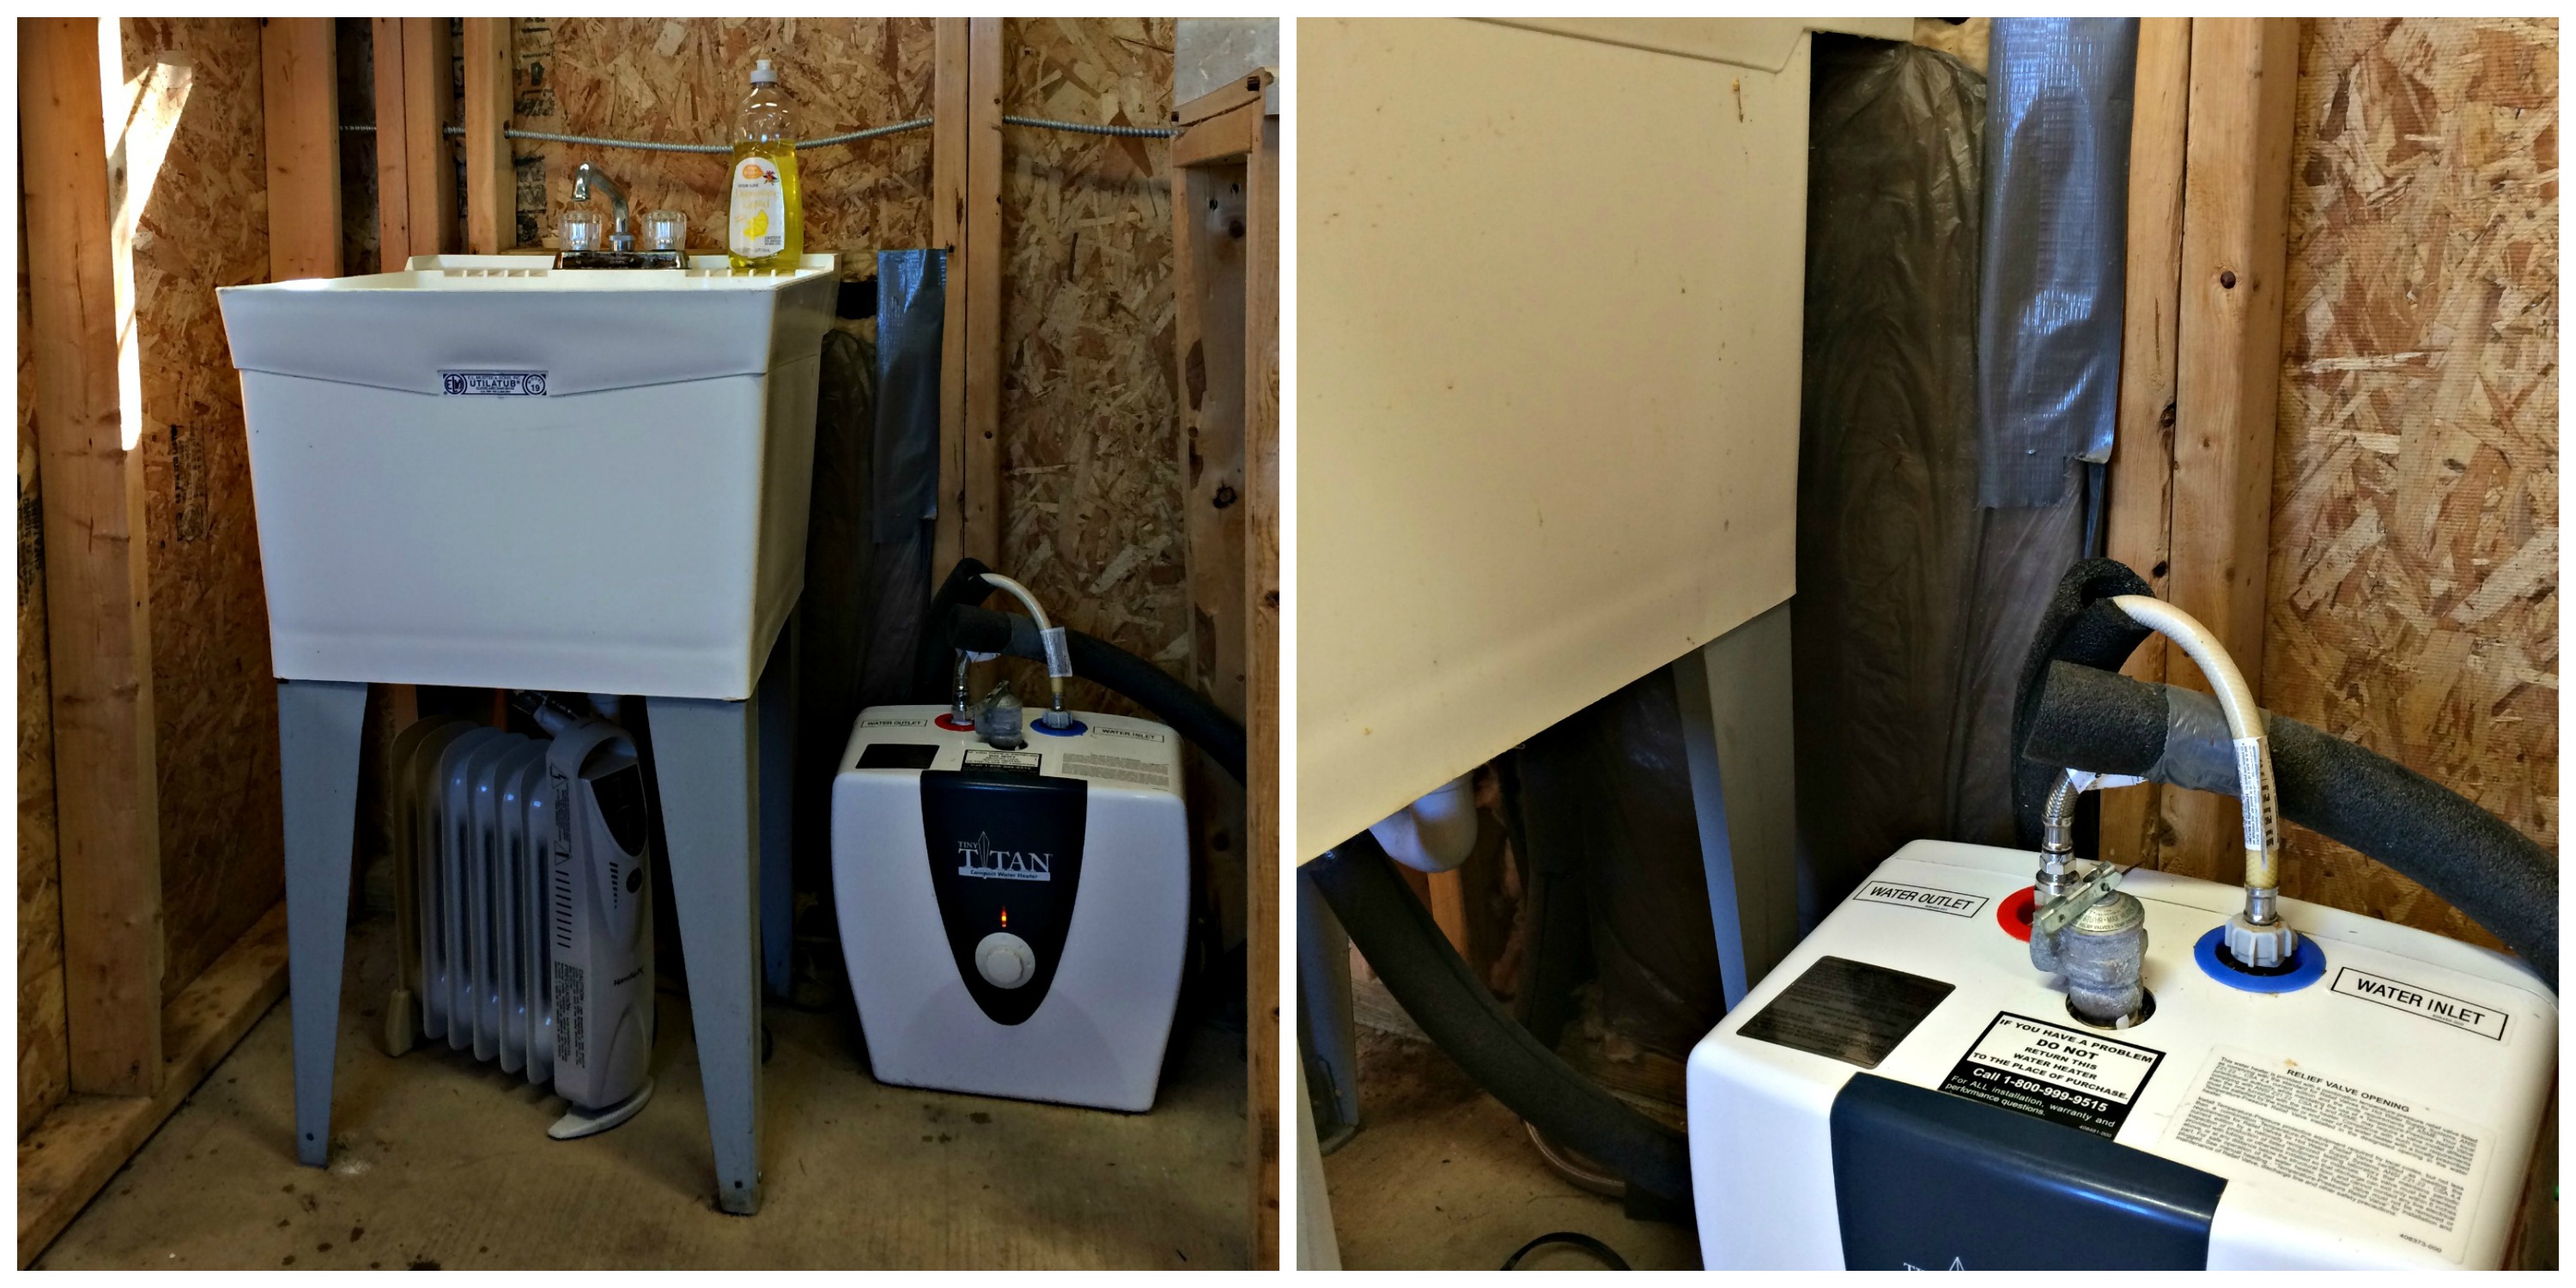
We have a sink with hot and cold running water. This works all but 3 months of the year. To keep it working as long as possible we have wrapped all the pipes in insulation and tucked a little heater underneath the sink. I drape an old sheet over the sink and radiator to contain the heat and keep the pipes warm in winter months.
#4 Heater
Yes, we have a mac-daddy, super-duper, awesome heater installed in the upper corner of our milk barn. It points directly on our sweet cow’s back and she loves it. We have this heater on a timer. In the winter we set it to come on an hour before we milk the cow. The walk to the milk barn may be frosty and horrible, but once we get inside it is a wonderful relief.
To say that our cows love the milk barn doesn’t even come close. It is truly a Cow-Spa.
- It is heated
- They get a hot-water udder bath
- They get brushed and groomed
- And they are served a tasty treat
What’s not to love? Our cows have always come running to the milk barn. Getting them there is never a problem. Getting them to leave (especially in winter) can be difficult.
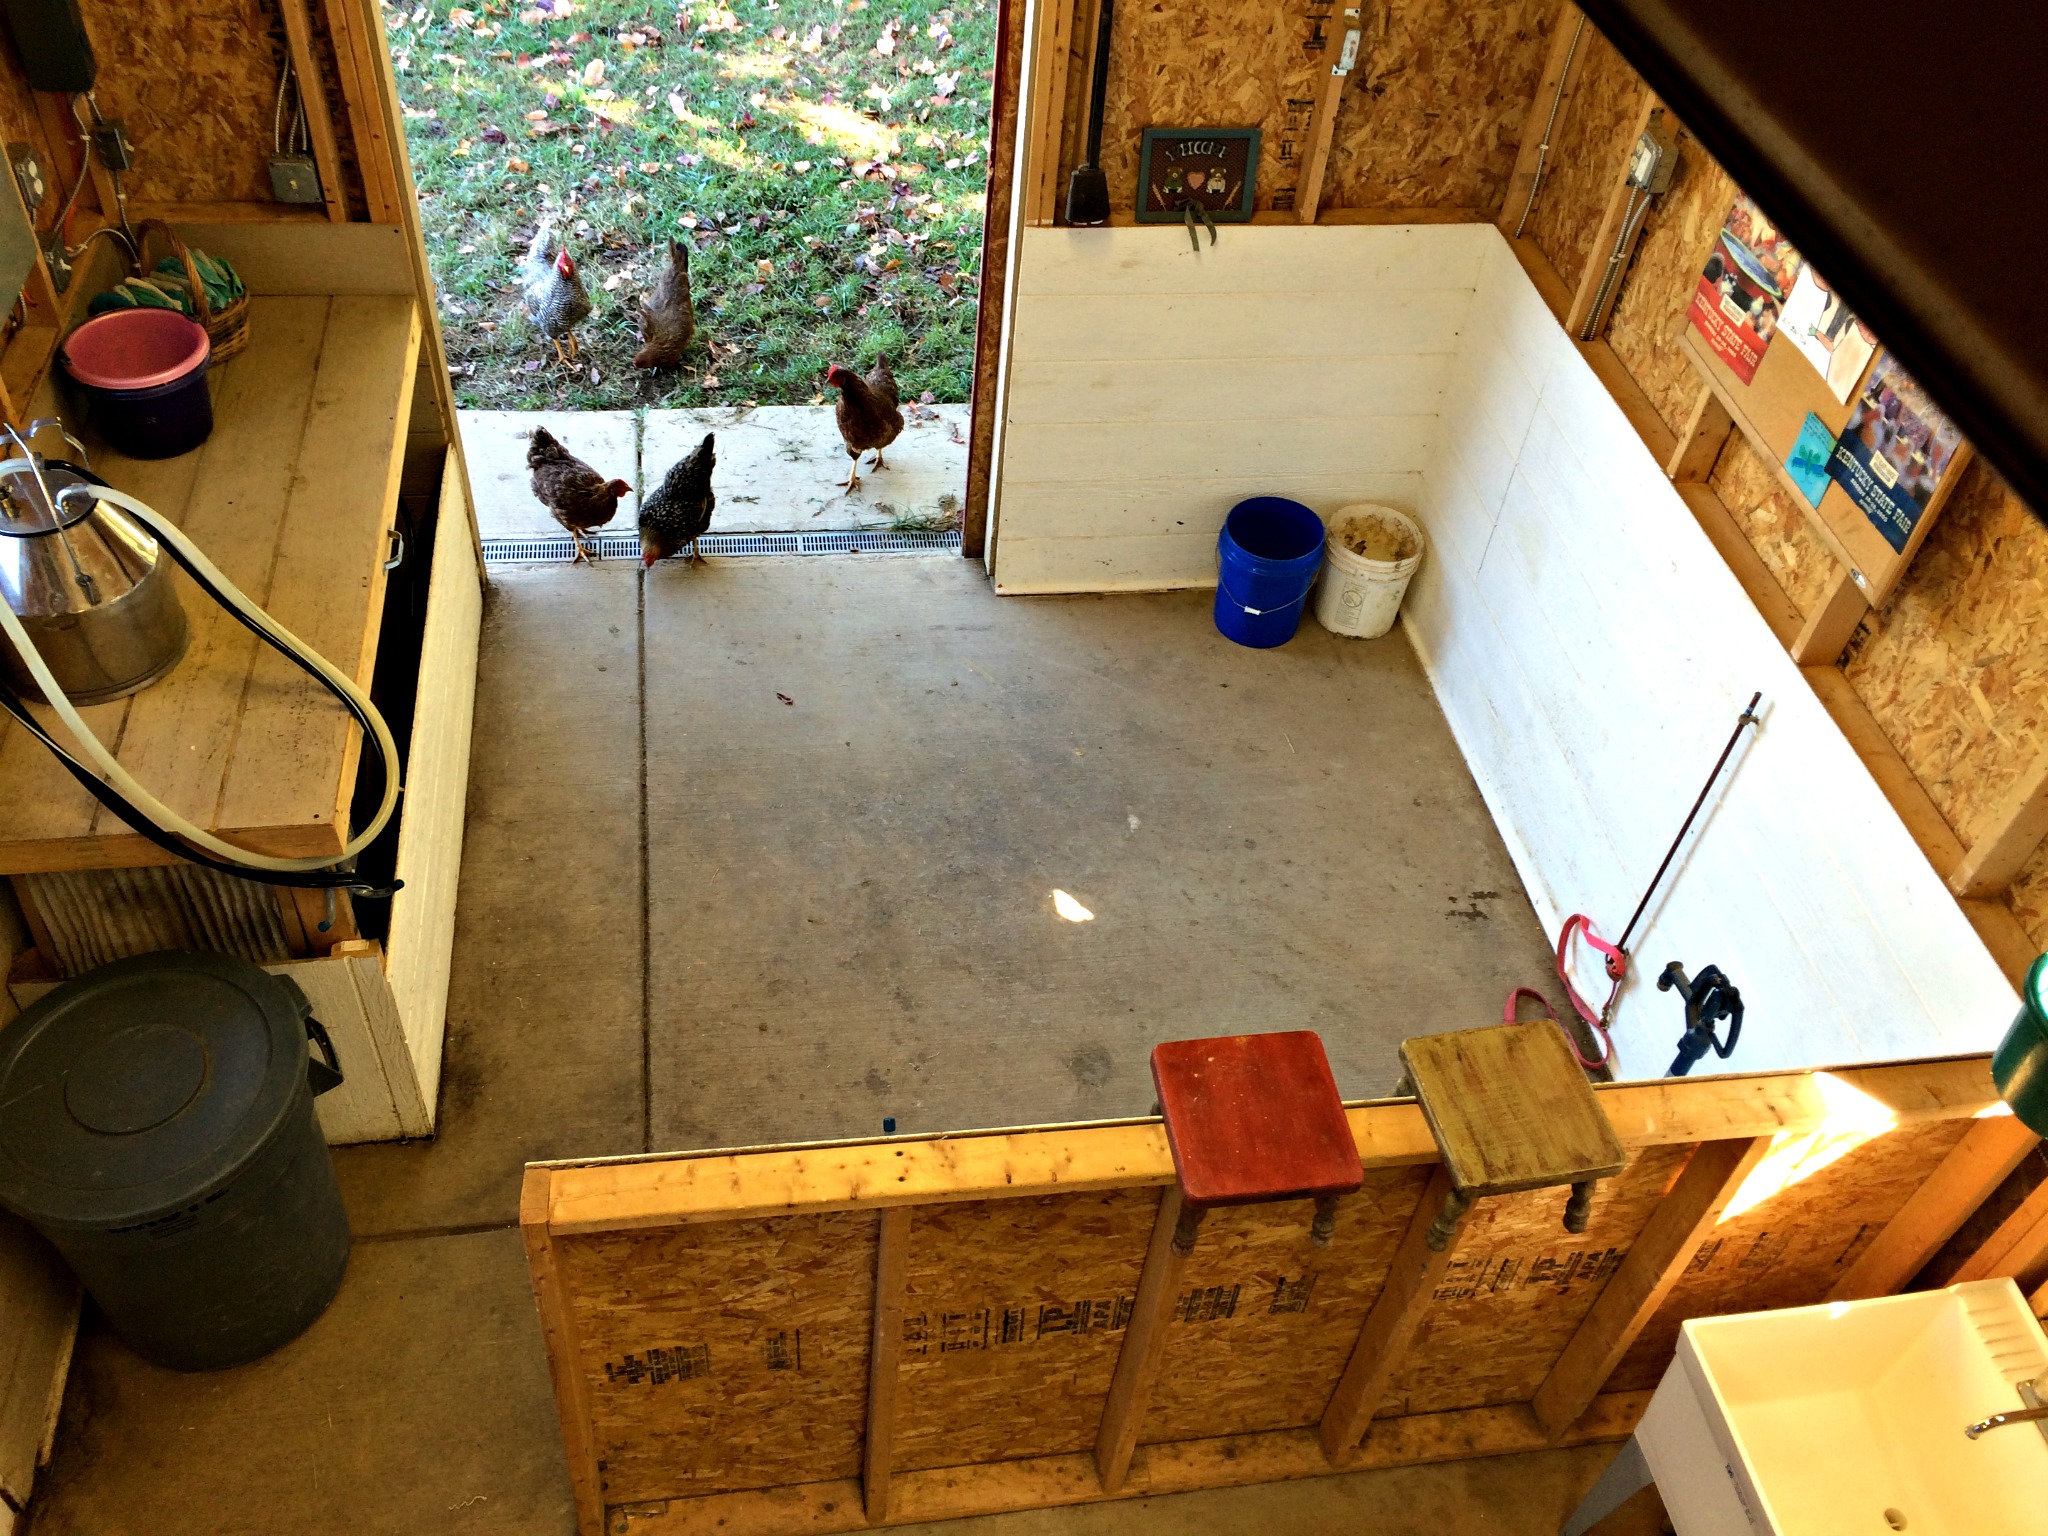
Here is a view from the loft. You can see the sliding door, the area where we milk the cow, the sink, counters, and grain can. AND… the free-range chickens. To hear why I want to shoot them go here.
The area under the loft (that you can’t see) is where we store minerals, hay, and supplies.
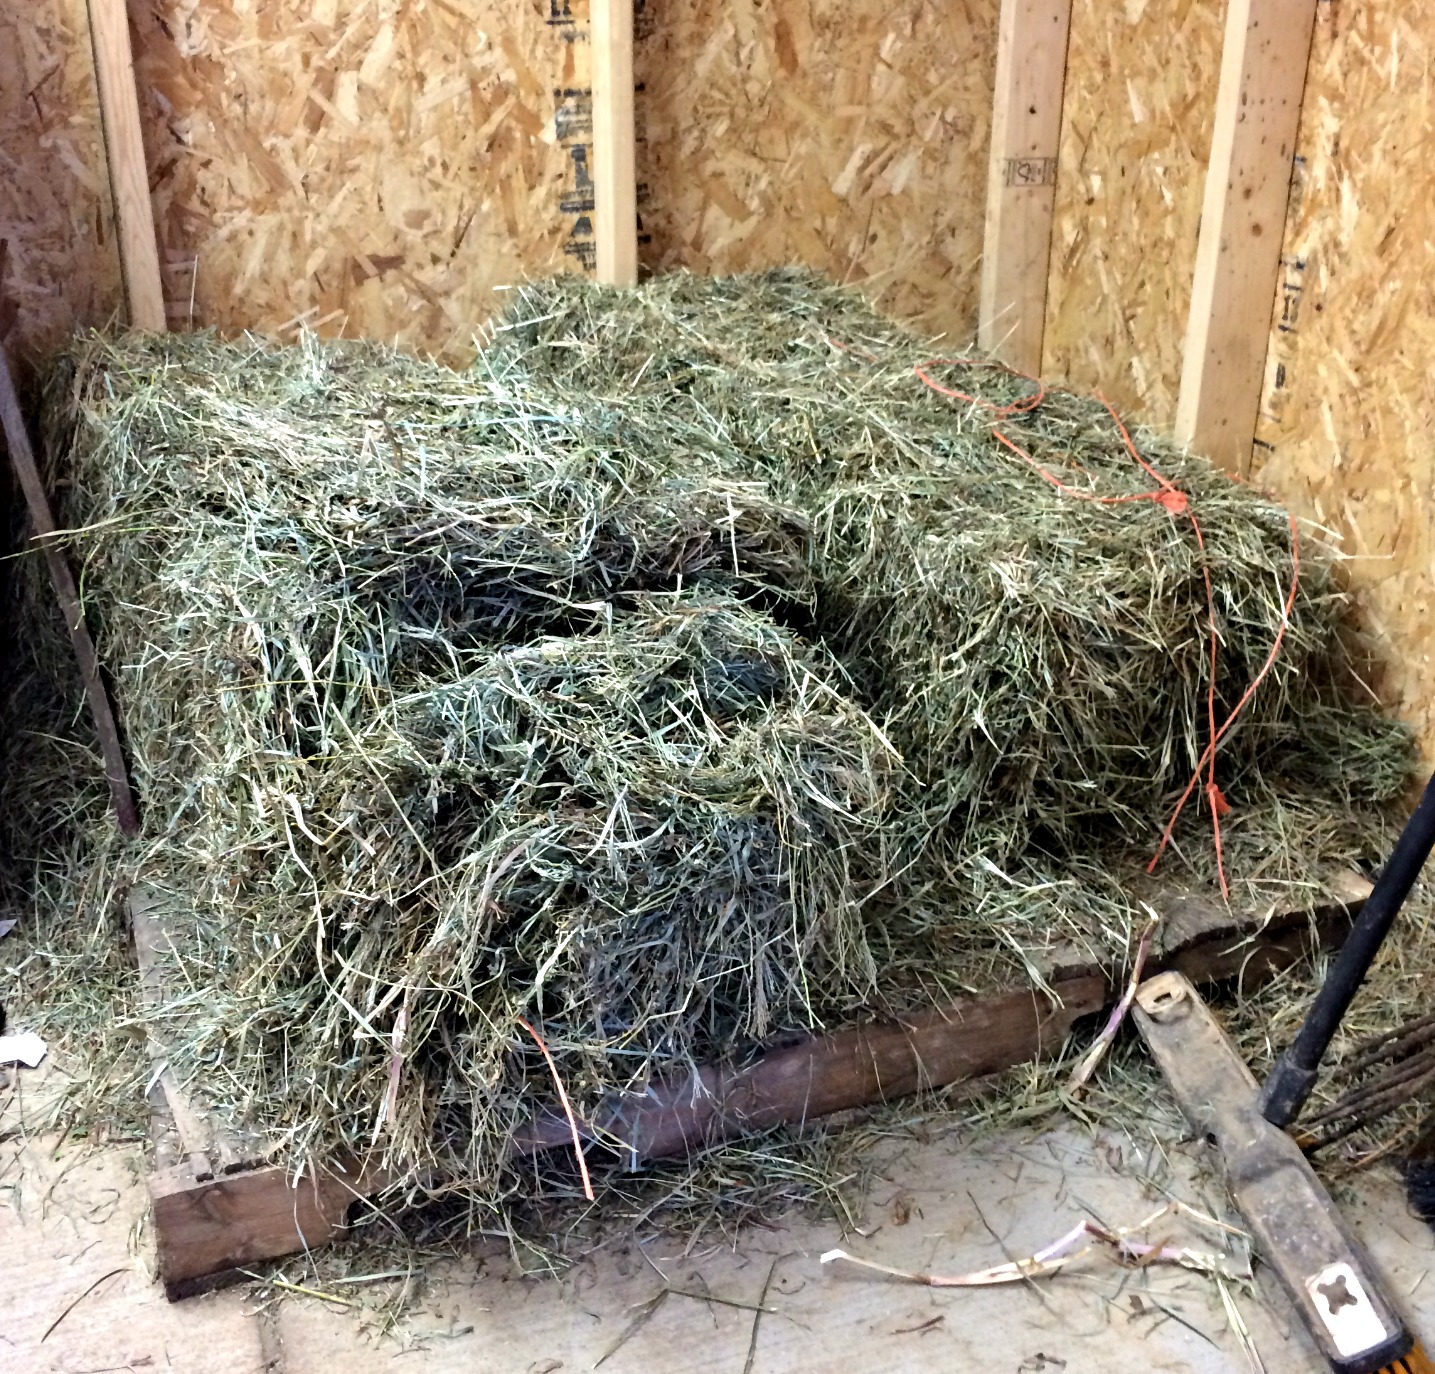
There is a pallet in the back corner of the milk barn where we keep a few square bales of hay. We always need hay and it is nice to have a little supply right in the milk barn so we can avoid the hike to the big red barn. For more on hay go here.
The LOFT
The last stop on the milk barn tour is the loft. This is the kid’s domain. We had originally envisioned this area holding bales and bales of fresh hay. We soon discovered that cows eat a lot of hay in winter and putting hay in the loft was a big waste of time. A week after we would get the loft filled, it would be empty again. It is not fun stacking hay in lofts. It is much easier to just grab the bale and feed it to the cows instead of letting it take a 3 day stop in the loft.
So, the loft does not hold hay, it holds kids, radios, stuffed cows, pillows, art supplies and other fun things. Some kids have tree houses; ours have a loft.
That wraps up the tour of the milk barn. The only thing missing from our milking parlor is a bathroom! I am blessed.
For healthy updates sign up here (You’ll get the miniBook “How to Eat” Free)
If you would like more homesteading, videos & tons of never-before-published real-food recipes – consider a membership. : )
Happy Milking!
Candi


Sam Lopez III
07/29/2016Where do you keep the cows in the winter – covered shelter ?
Candi
07/29/2016Each of our pastures have some wooded areas and run-ins. Cows actually enjoy cooler weather. The heat of summer is much harder on them than the winter cold. Here in KY we don’t get too much frozen weather – our cows will hunker down in the run-in’s if it’s really nasty out (frozen rain, sleet).
Jennifer
03/09/2018What a great setup! Where did you buy the little shed/barn from?
CJ
03/09/2018We bought the barn shell from a guy called “The Shedi-Master.” LOL! It was several years ago so I don’t know if he’s still building.
Loved him – he built the milk barn for us & a run-in. And his prices were great.
-CJ
Josef
11/30/2018I was just wondering what are the demensions of the milking portion of the barn?
CJ
12/01/2018Short answer: the spot where the cow stands while I milk her is 10 X 9 feet.
The barn is 12 feet by 20 feet. We divided it in half but there was a window we had to work around. The milking side is a foot smaller than the storage side. So the side used for milking the cow was 12 feet by 9 feet. There is a giant pump against the wall that takes up 2 feet of space – so the cow has about 10 feet by 9 feet to stand while we milk her.
This has worked out well for our jerseys. They are not huge cows. When we have had vets out or IA (Artificial Insemination) there is plenty of space for everyone (and the cow) to work.
We only use our milk barn for milking (or vet checks). Our cows have run-ins in each of their fields to get out of the weather. If you need space in your milking barn for your cow to hang out – you may want to make it bigger or build a lean-to off of one side.
Best of luck! Let me know if you have any other questions.
-CJ
Christine
06/03/2020Could you milk 2 cows at the same time in the milking side?
I’m trying to design our milk barn and researching how much space we’ll need!
Thanks,
Chrsitine
CJ
06/20/2020No. If you want room for two cows, you’ll need more space. You will probably want to have 5 feet for each cow and have space for you (and the milking supplies) between them. My cows don’t always stay straight in the milk barn either, so if you wanted to have two you may want to put up some sort of rail to keep them on their side. 🙂